
Zaprite now offers the ability to connect your ZEBEDEE Gamertag and receive payments directly into your ZEBEDEE wallet. If you don’t have a ZEBEDEE account, head over to zebedee.io to learn more and get started.
Connect your ZEBEDEE account
The following is a short guide on how you can connect your own ZEBEDEE Gamertag to Zaprite to start accepting lightning payments.
Step 1: Activate ZEBEDEE payments
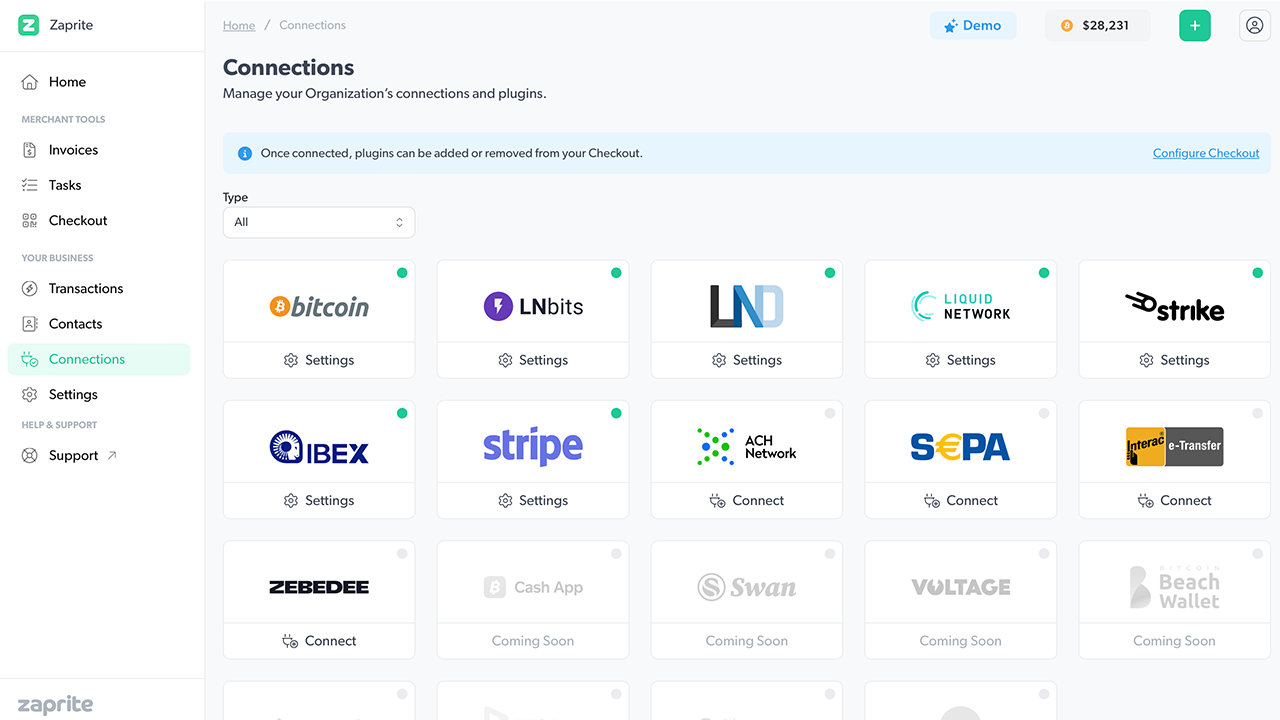
The first step is to activate the ZEBEDEE plugin. Simply visit the Connections tab and click the ‘Connect’ link under the ZEBEDEE card.
Once activated, you will be brought to the ‘Settings’ screen to configure your connection.
Step 2: Configure your connection
The next step involves adding your ZEBEDEE Gamertag.
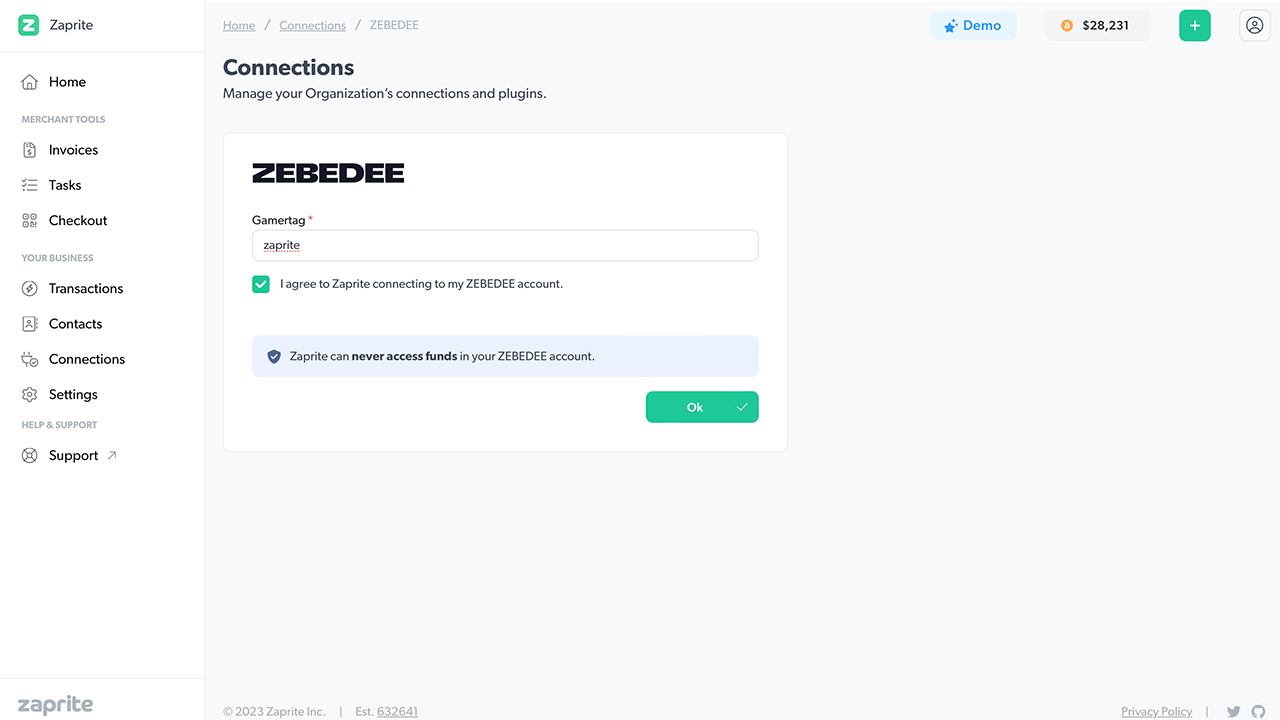
Make sure you check the box to agree to the terms, then click [Connect].
Note: Your ZEBEDEE Gamertag can only be used to generate receive invoices. Zaprite can never access your funds or spend from your account.
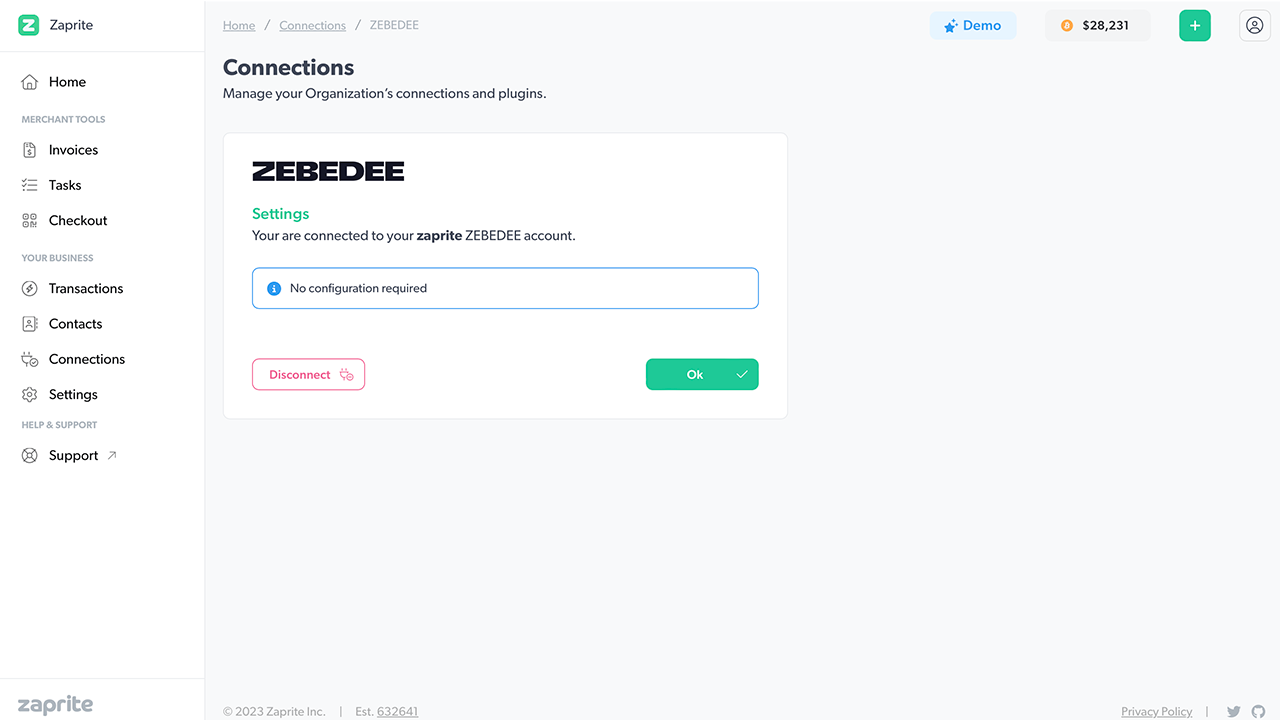
If you want to disconnect your account you can simply click the Disconnect button and your ZEBEDEE account information will be removed from our database. You can reconnect at any time.
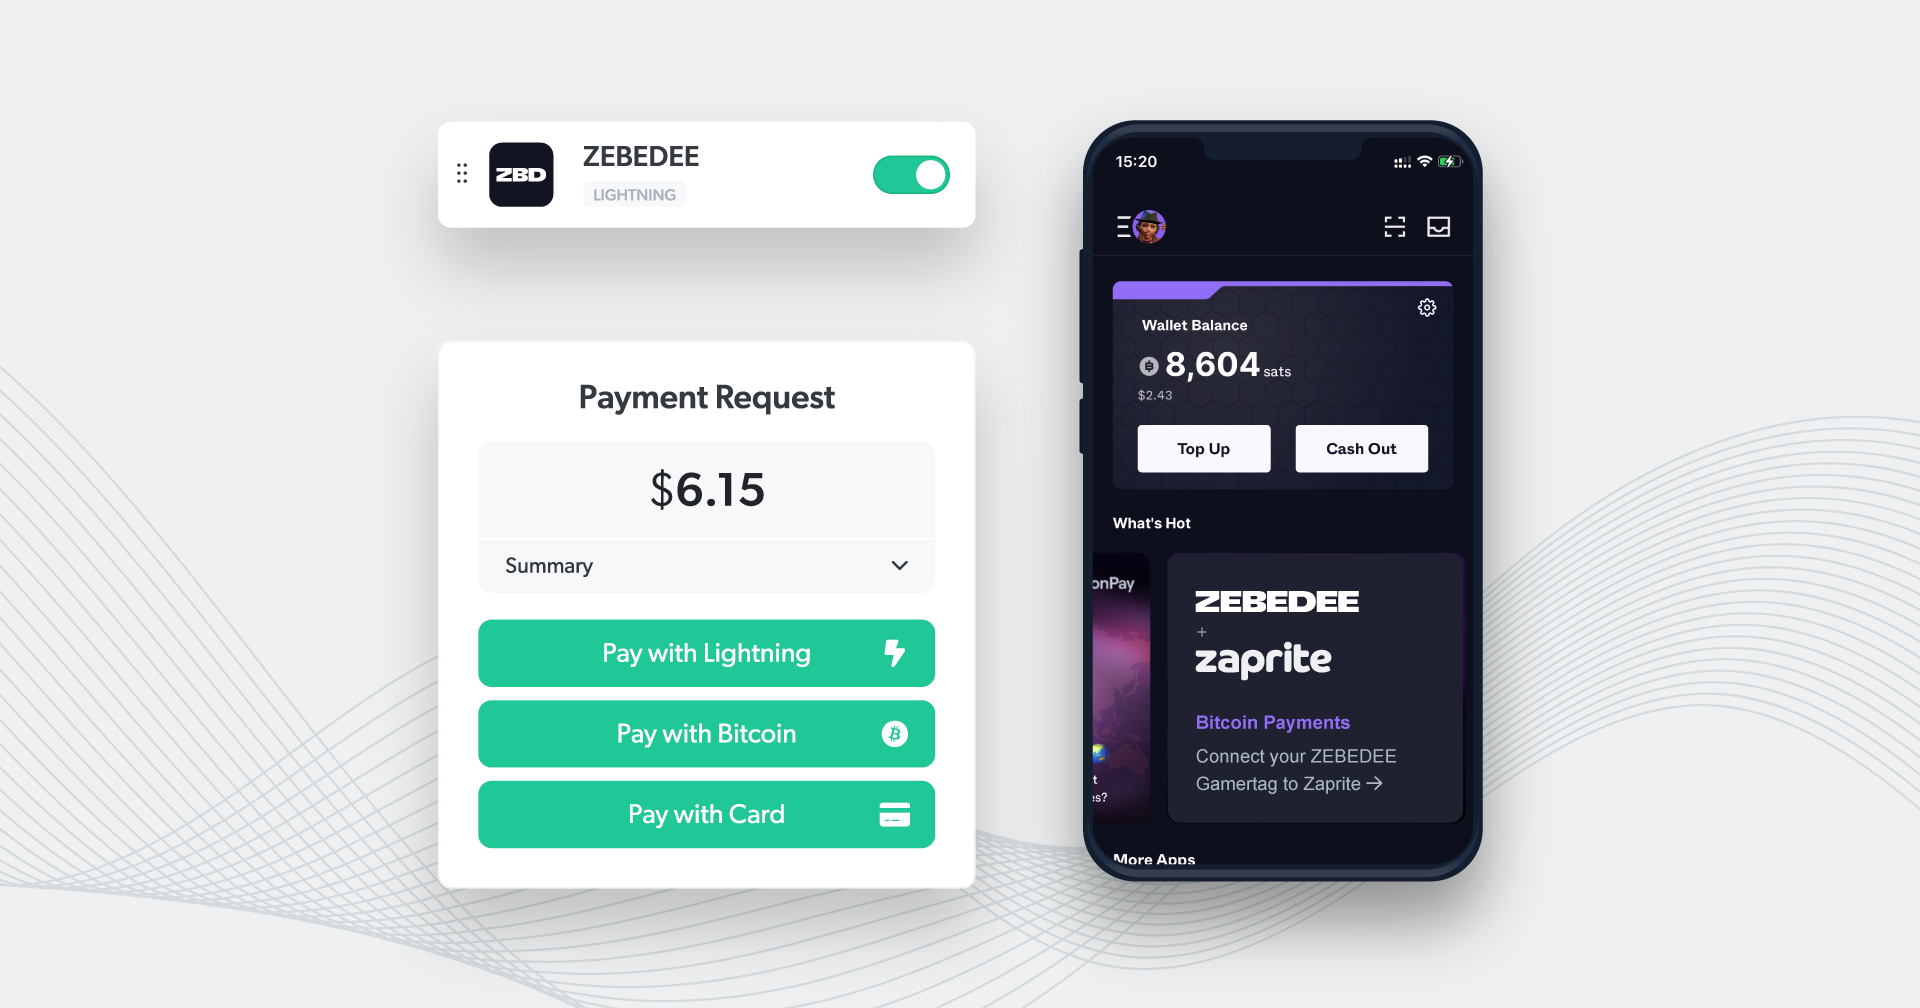
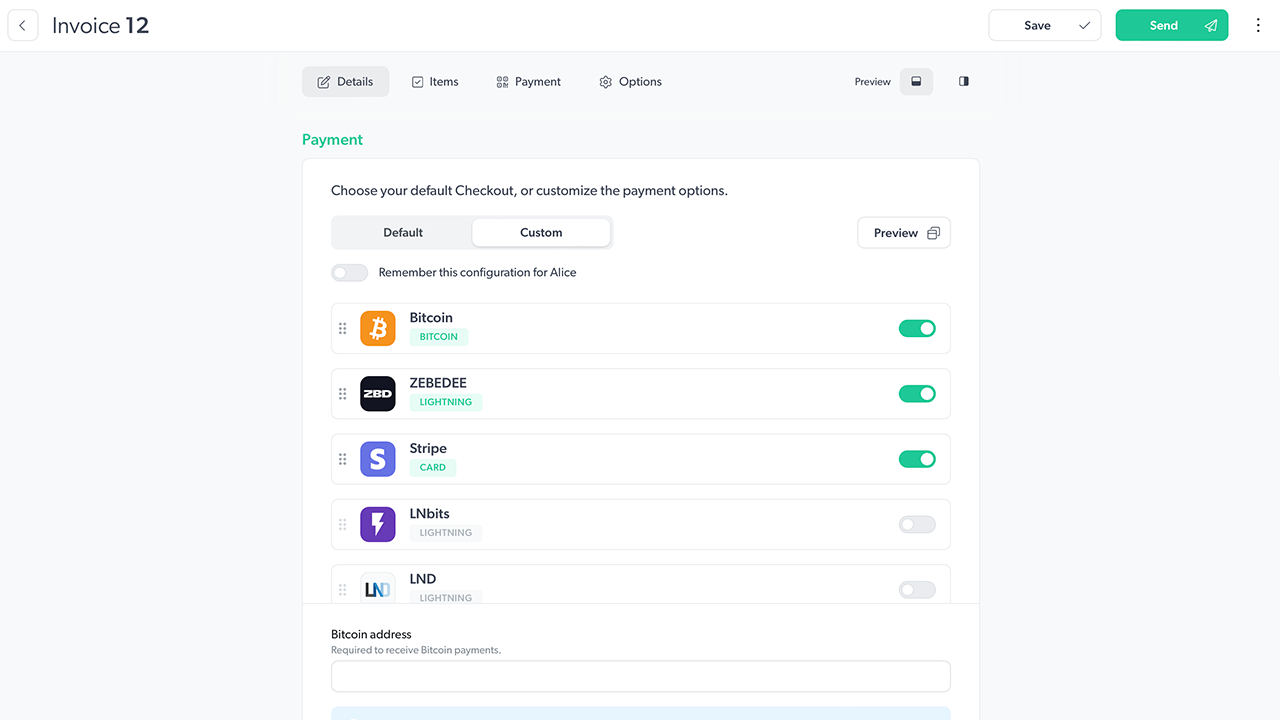
Step 3: Enable ZEBEDEE on new Invoices
Now you are free to enable ZEBEDEE payments on Checkouts and Invoices. For Invoices, simply click the ZEBEDEE toggle in the Payment section to allow your customer to pay over Lightning and have funds deposited straight into your ZEBEDEE wallet. The Checkout settings page includes a similar toggle.
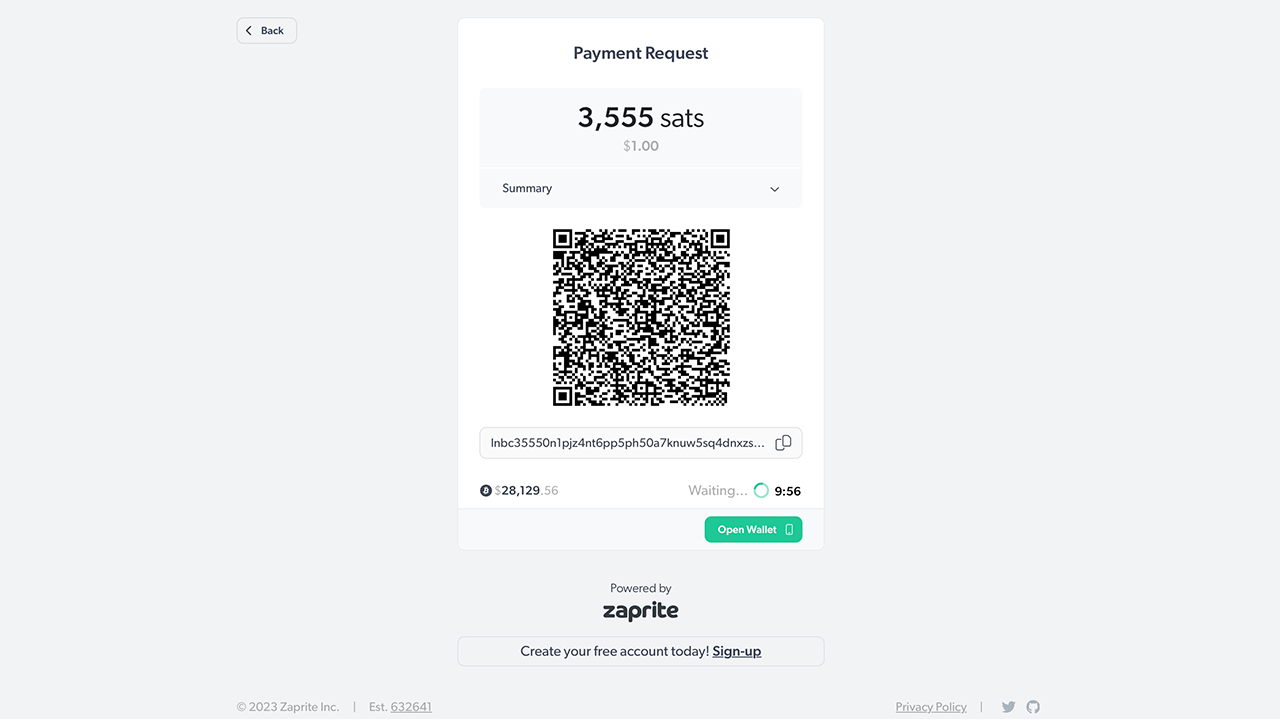
When you send a new Invoice, the recipient will now see a Lightning option and a QR code will be automatically generated by Zaprite using a live quote from ZEBEDEE. When your Invoice is paid, you will receive an email notification with the payment details and the payer will receive an email receipt.
That’s it! You should now have ZEBEDEE payment options enabled on your Zaprite Checkouts and Invoices.
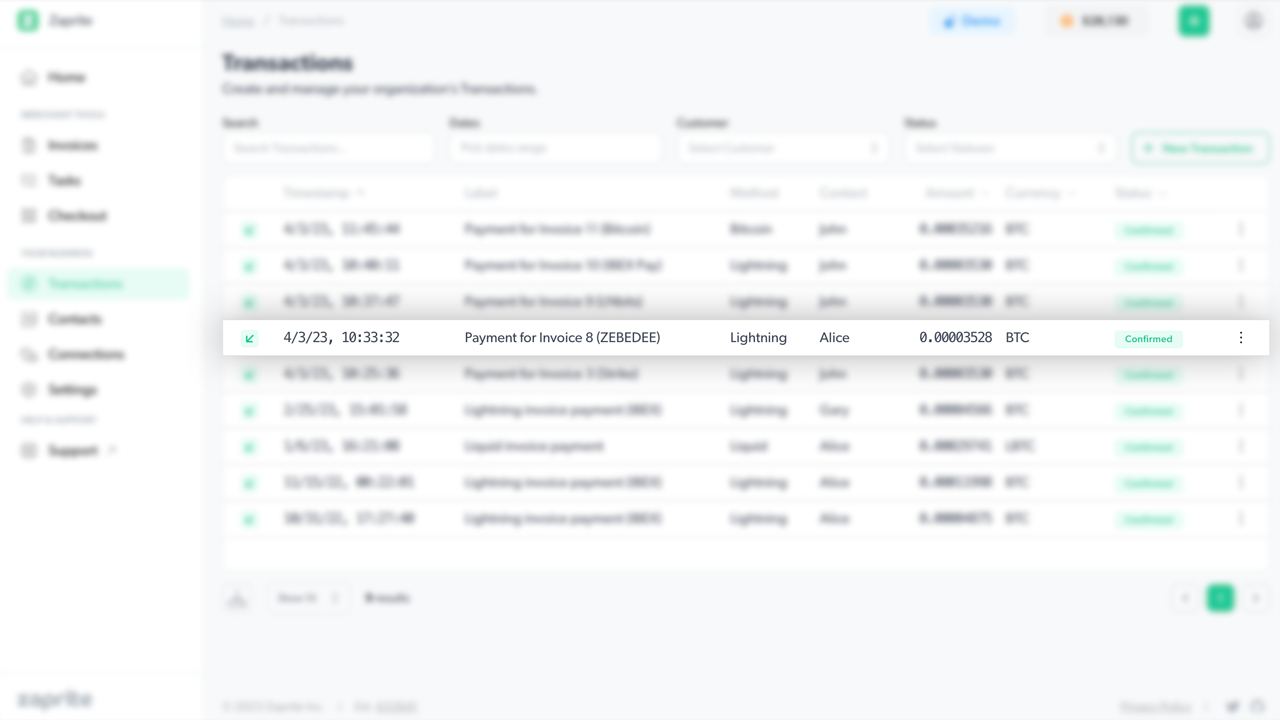
When a payment is detected, we’ll record it in your Transaction history for future accounting and reconciliation.
If you run into any issues connecting your ZEBEDEE account, or have general questions about using Zaprite, feel free to reach out at https://help.zaprite.com.