
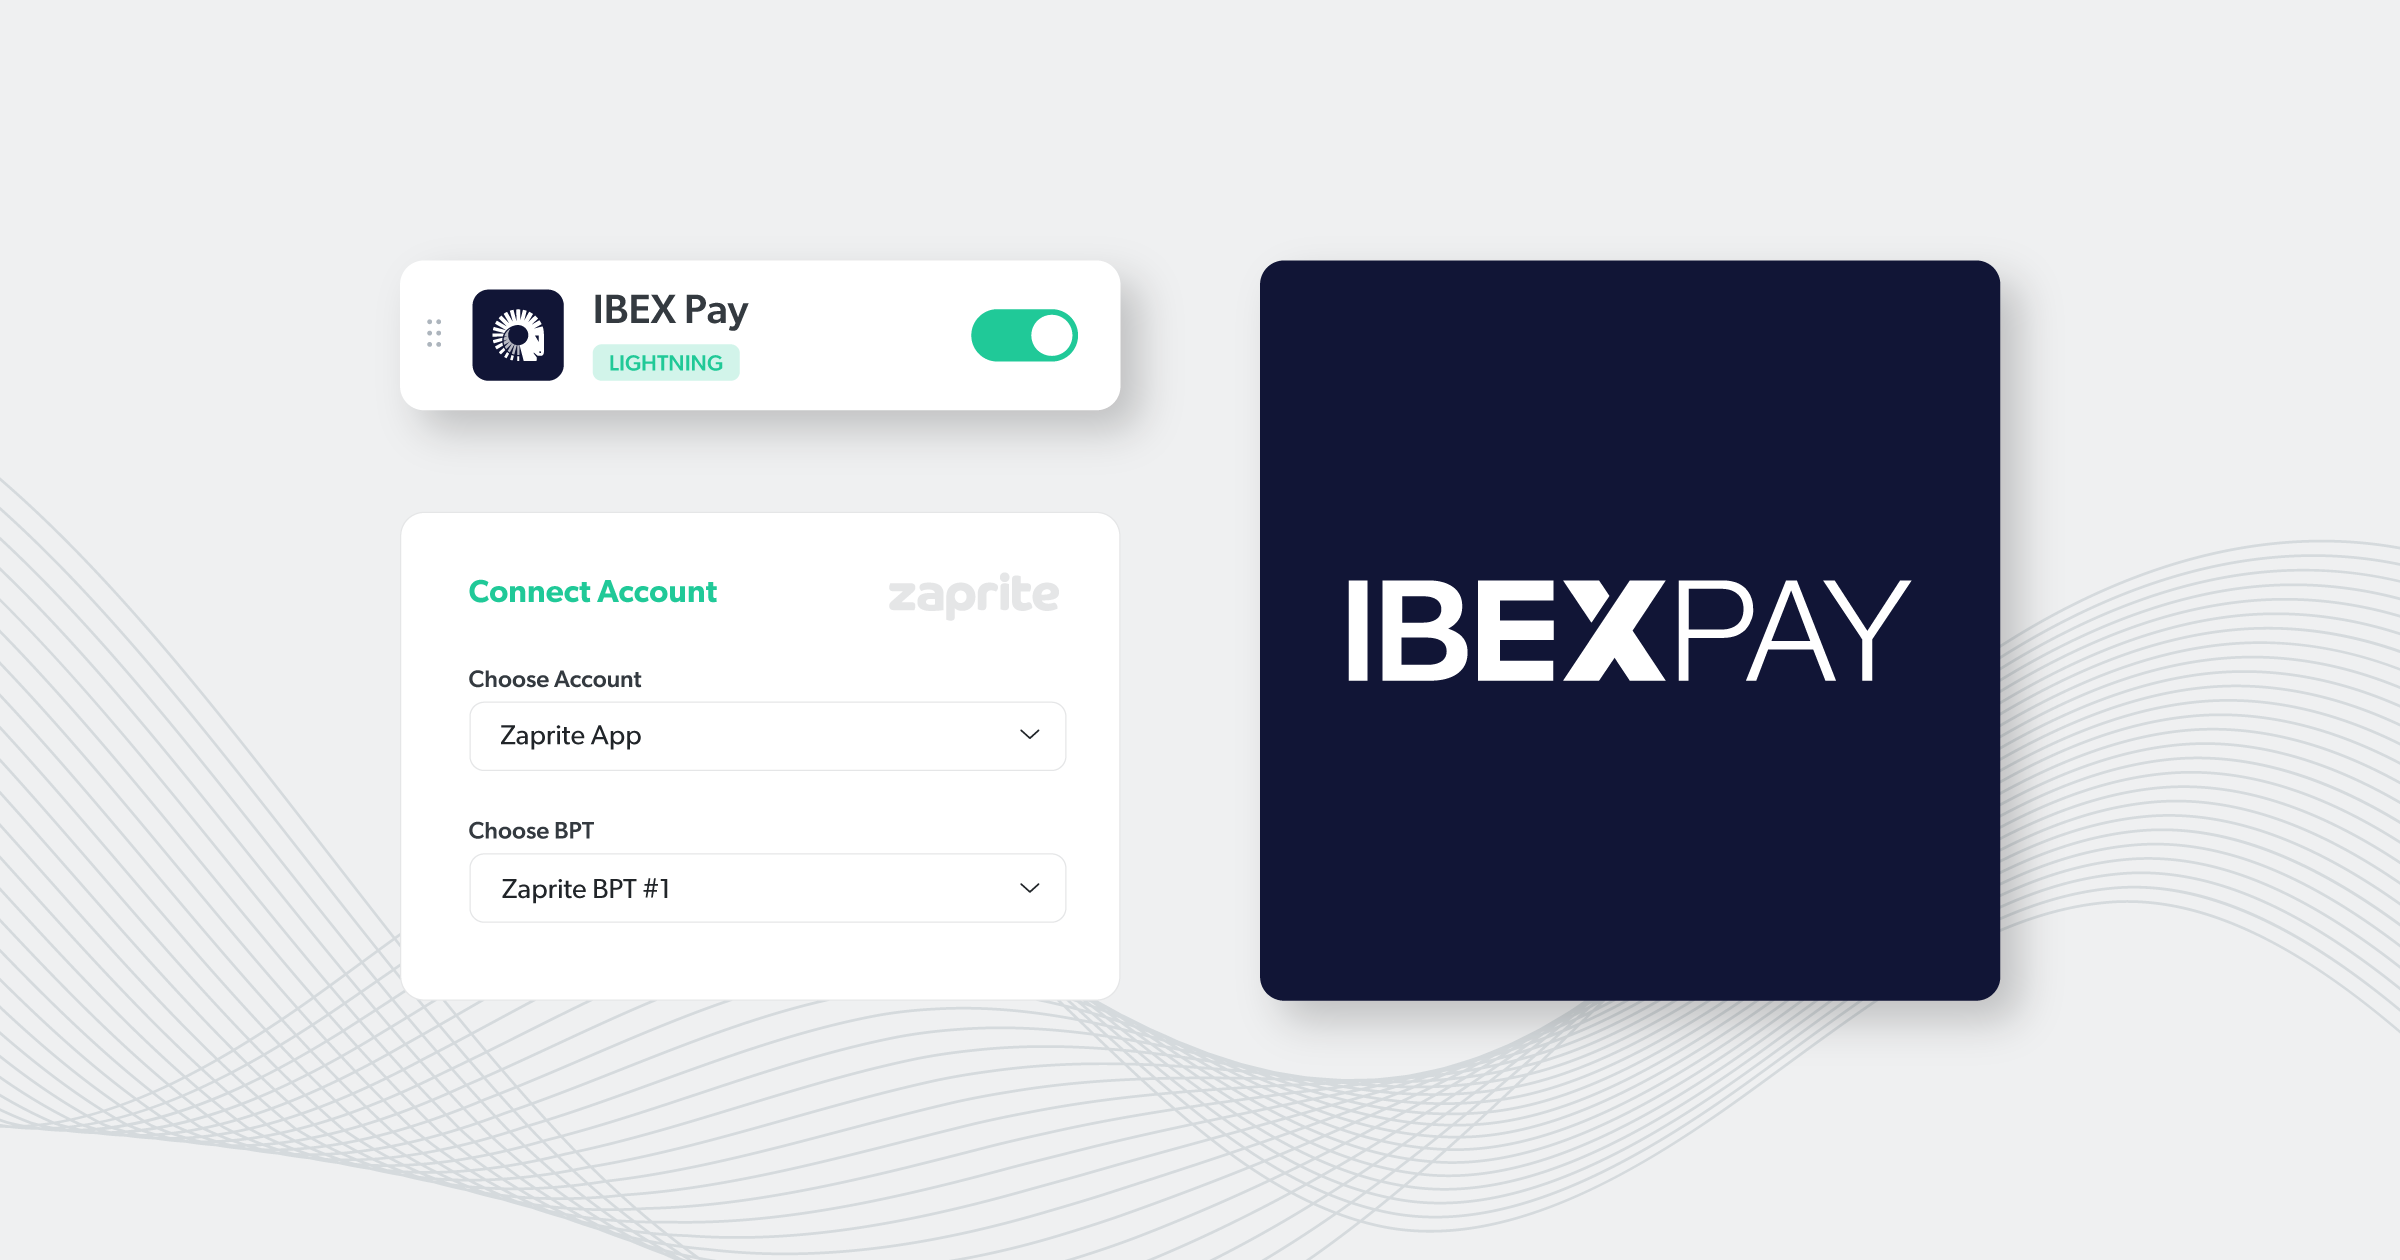
Zaprite now offers the ability to connect your IBEX Pay account and receive all payments directly into your IBEX account.
If you don’t have an IBEX account, you can create one within Zaprite and receive an email from IBEX to complete your account registration.
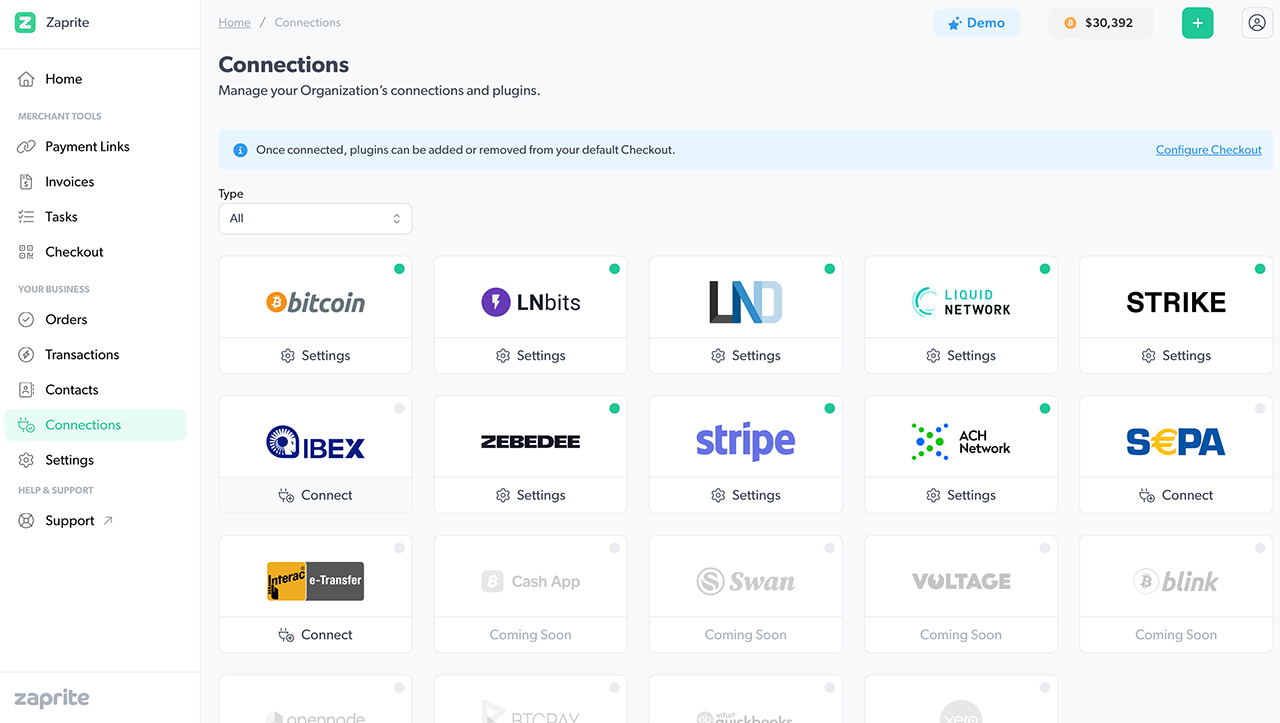
Connect an IBEX Pay account
Step 1: Activate IBEX payments
Before you can connect your account, you need to activate the IBEX plugin. Simply visit Account > Payments and click the ‘Connect’ link under the IBEX card.
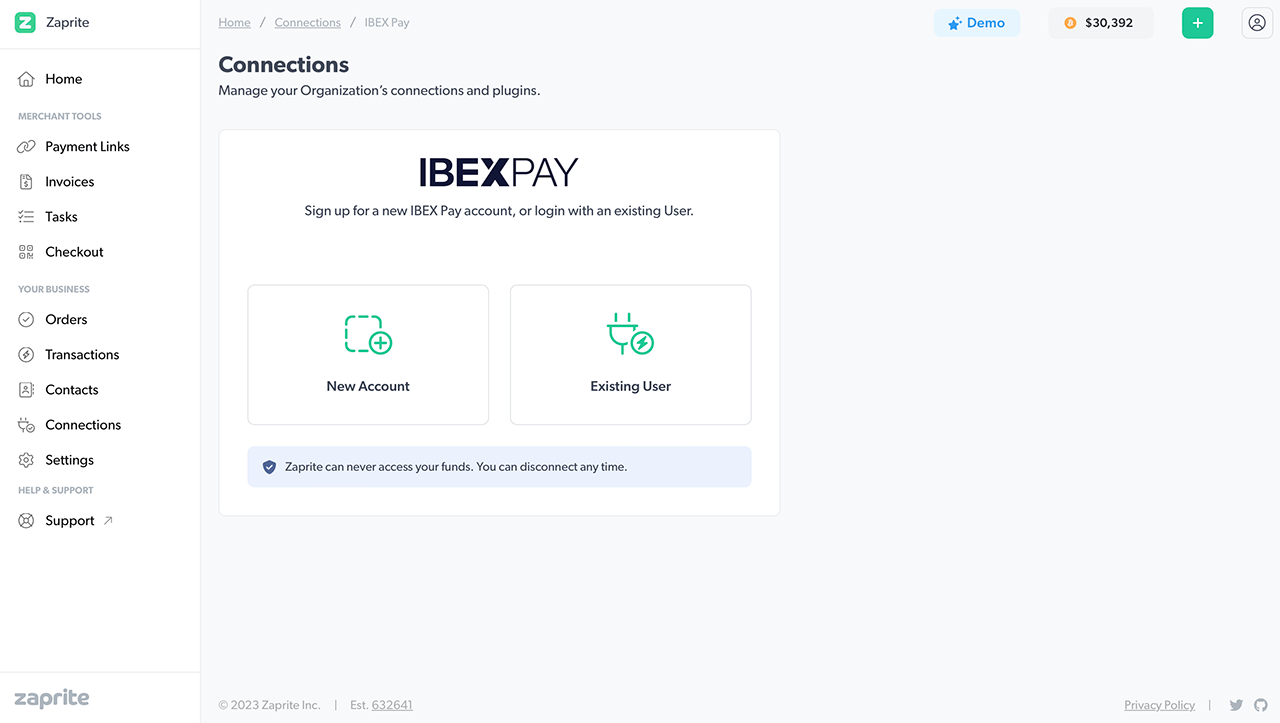
Step 2: Choose your connection type
The next step involves choosing whether you want to create a new IBEX Pay account for use on Zaprite, or connect an existing account if you already have one.
Option 1: Sign-up for a new IBEX account
If you choose to create a new account, just fill out the fields shown below and Zaprite will create a default Account and Bitcoin Payment Terminal (BPT) for your Organization. We recommend only using this ‘Zaprite’ Account and BPT for Zaprite payments. If you are using your IBEX Pay account with other third-party services, it is recommended to create a new Account and BPT for each service.
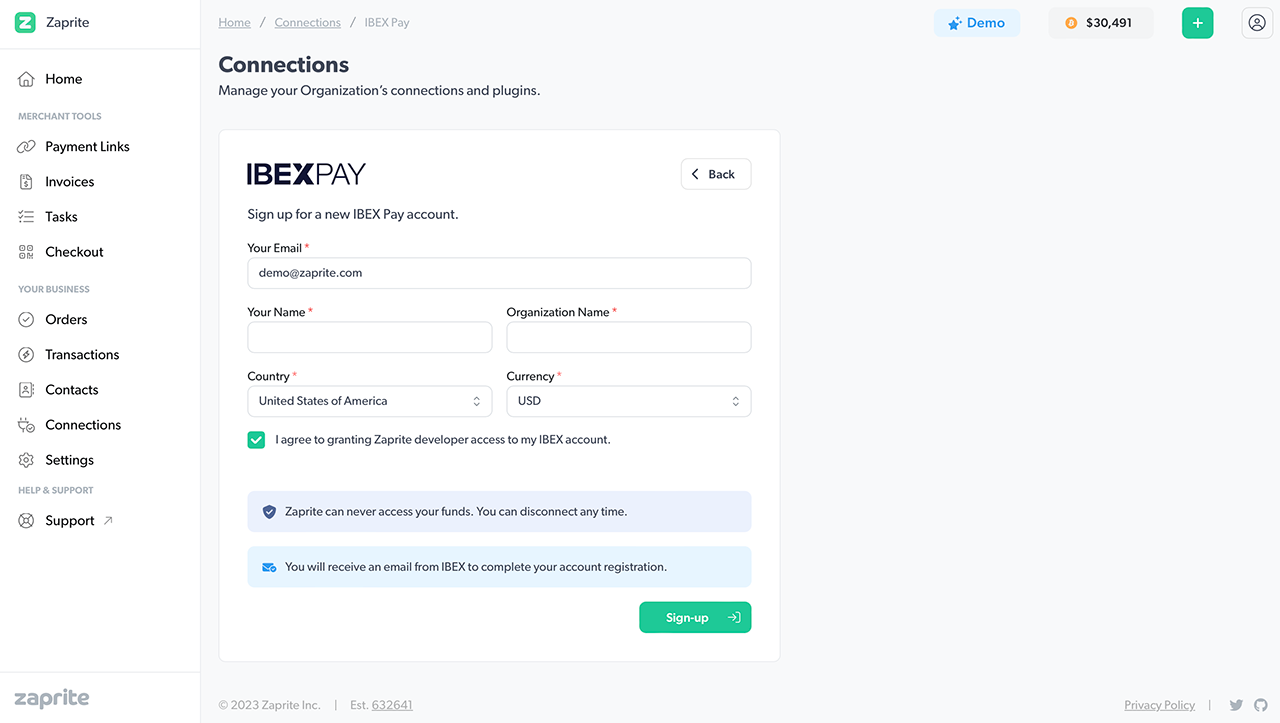
Make sure you check the box to agree to the terms, then click [Sign-up].
Note: Your account connection can only be used to generate receive invoices. Zaprite never has access to the funds in your IBEX Accounts.
Option 2: Connect an existing IBEX account
If you would like to connect an existing IBEX Pay account, you will need to share a Developer Token with Zaprite so we can generate receiving invoices on your behalf.
Developer Token
Login to your IBEX Pay dashboard and visit the Integrations tab in the main navigation. From there click on [Generate] button under the Developer Token section of the page.
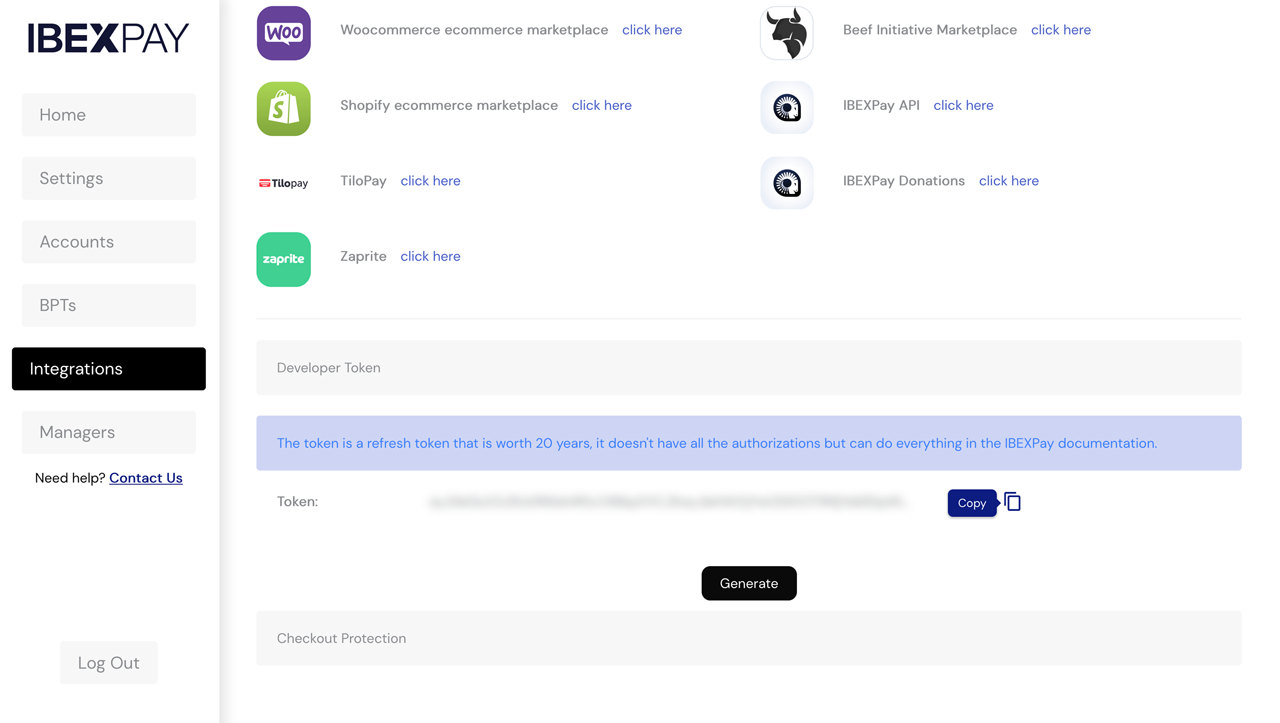
Copy the Developer Token and paste it into the corresponding field in Zaprite and then click [Connect].
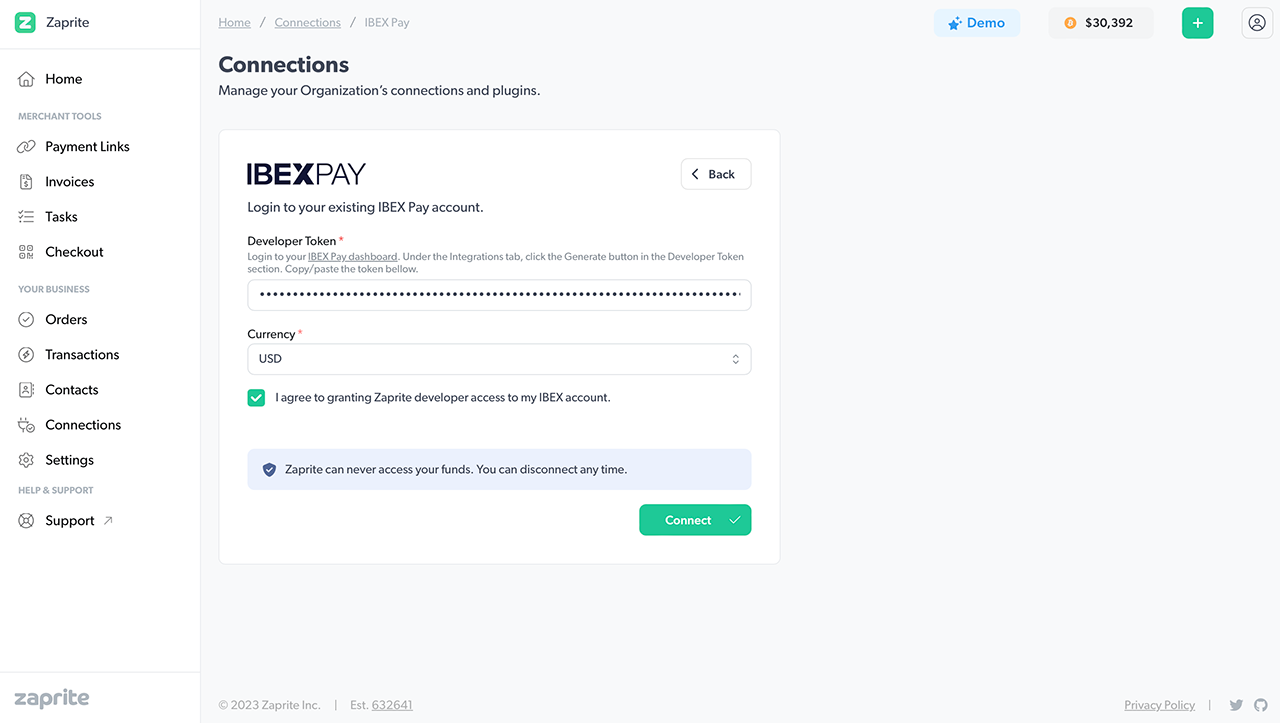
Note: Your can revoke the Developer Token at any time by disconnecting your IBEX account from Zaprite.
Step 3: Choose your Account and BPT
Now that your IBEX account is connected, you will need to select an Account and Bitcoin Payment Terminal (BPT) to use with Zaprite. If you created a new IBEX account inside Zaprite we will have created a new Account (‘Zaprite App’) and BPT (‘Zaprite Invoices’) for you and these will be loaded and selected automatically.

If you signed into an existing IBEX account we will retrieve any Accounts and BPTs that you currently have and display them. Simply select an Account and then a corresponding BPT that you would prefer to use for Zaprite.
If you want to disconnect your account at any time you can simply click the [Disconnect] button and your IBEX account information will be removed and Developer Token revoked.
Step 4: Enable IBEX as a Payment Method
Now you are free to enable IBEX payments on new Invoices and payment Links. Simply click the IBEX toggle in the Payment section to allow your client to pay over Lightning and have funds deposited straight into your IBEX account.
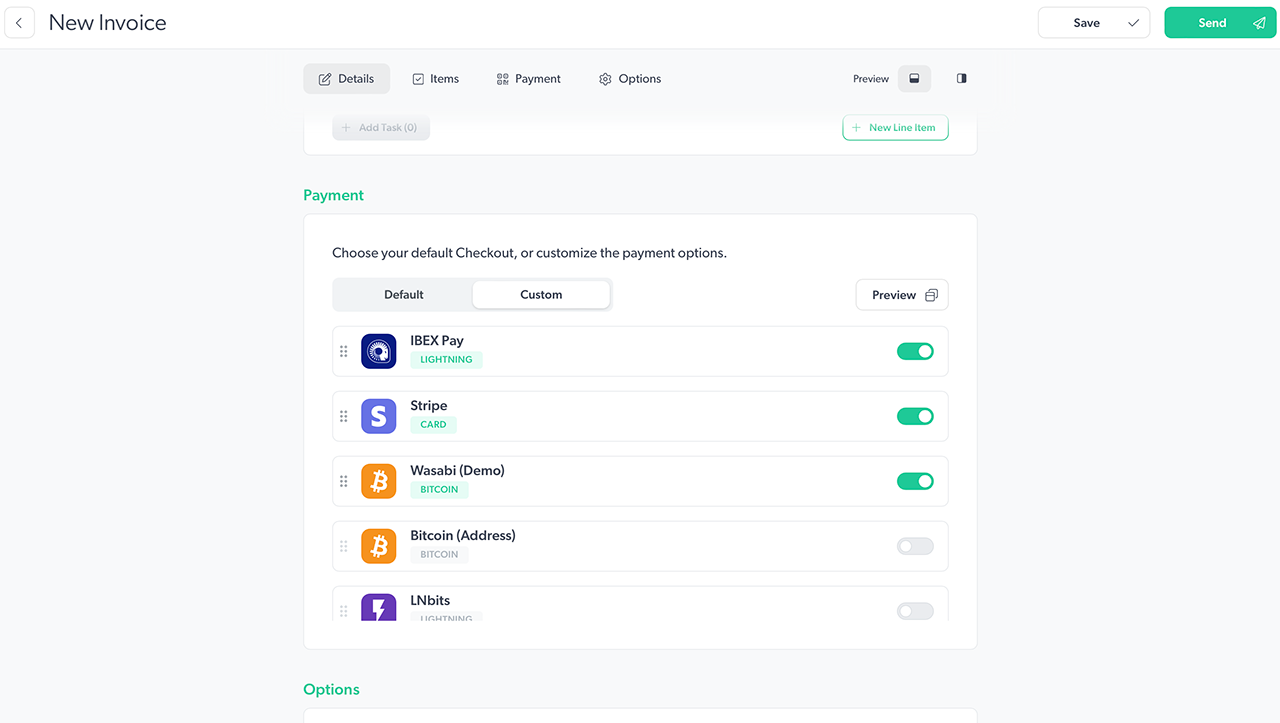
When you send a new Invoice or create a Payment Link, the payer will now see a Lightning option and a QR code will be automatically generated directly from your IBEX payment terminal. When a payment is complete you will receive an email notification with the payment details and the payer will receive an email receipt.

That’s it! You should now have IBEX payment options enabled on your Zaprite invoices.
When a payment is detected, we’ll send out the relevant notification emails and record the information in your transaction history for future accounting and reconciliation.
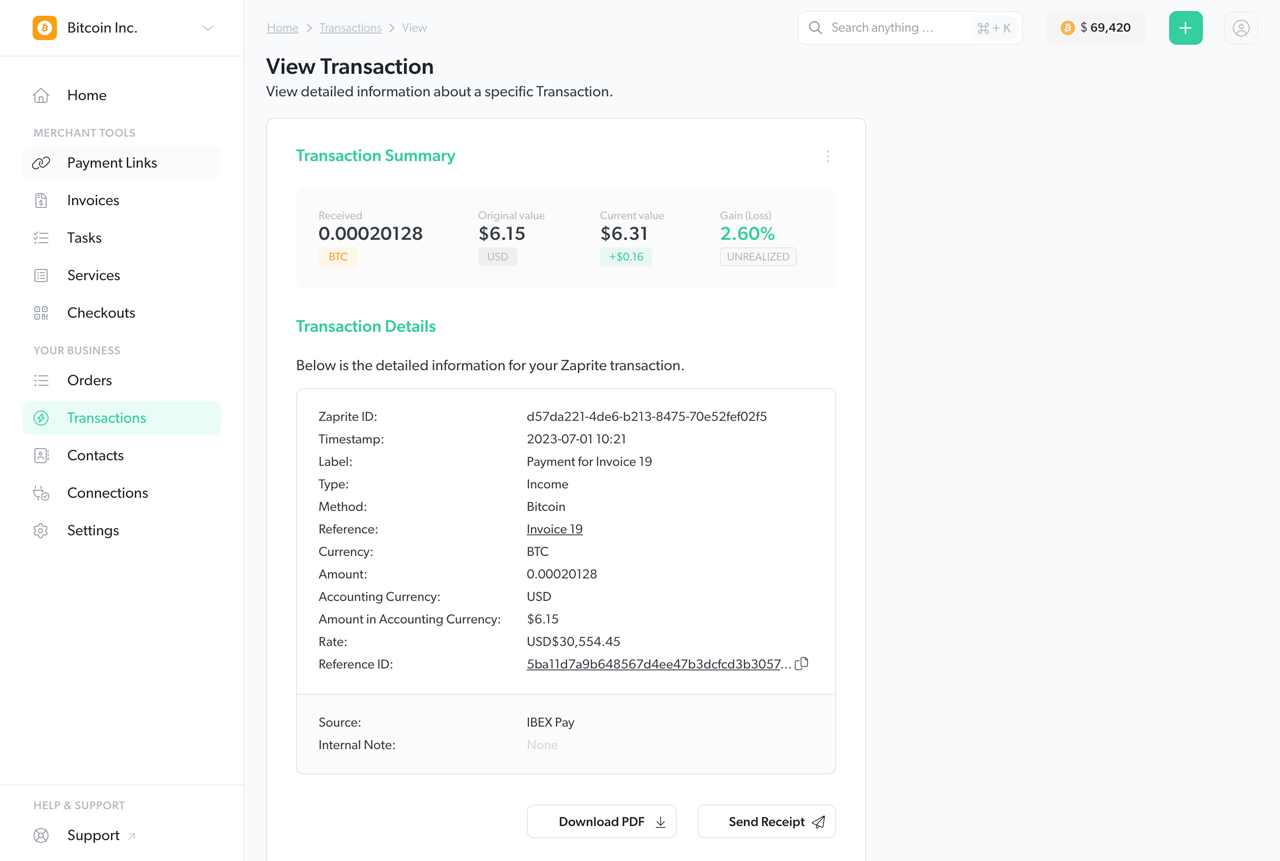
Of course, you can always see a record of your Transactions in your IBEX Pay dashboard as well.
Next Steps
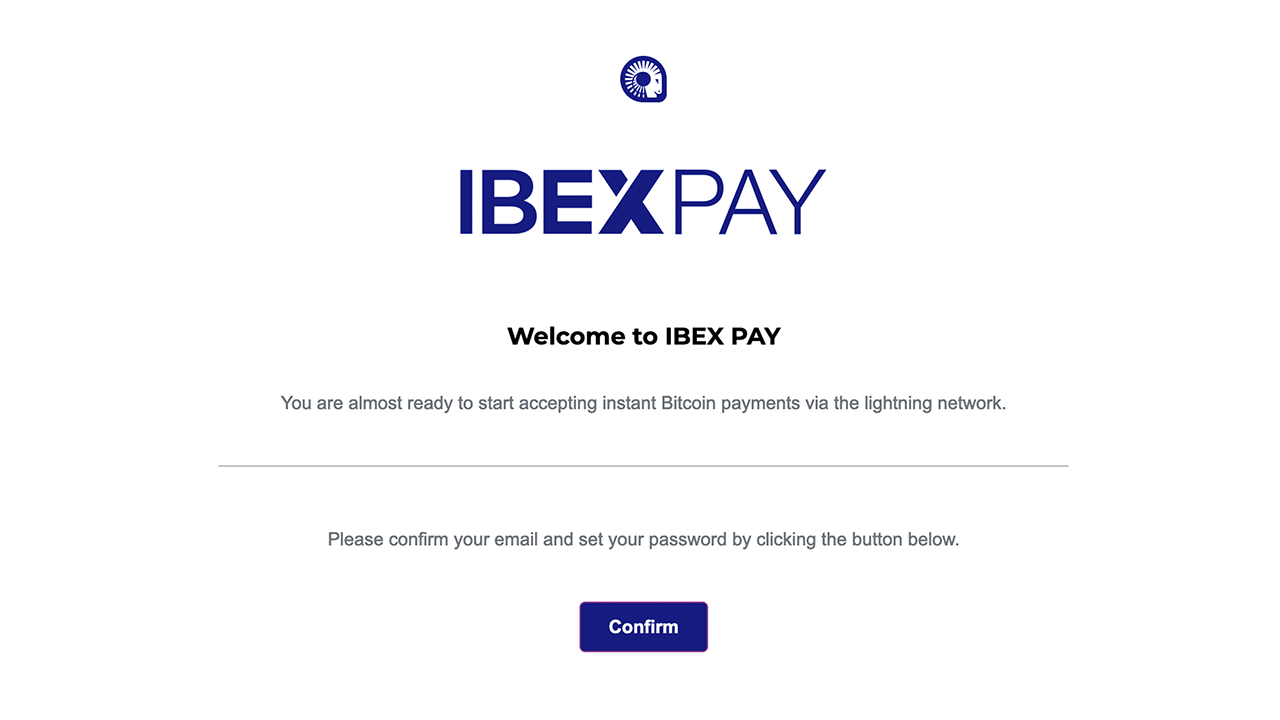
If you signed up for a new IBEX account within Zaprite, look out for a confirmation email from IBEX. It will include a link to complete your account registration.
Watch a Demo
Watch a quick video demo of the IBEX integration with Zaprite.
If you run into any issues connecting your IBEX Pay account, or have general questions about using Zaprite, feel free to reach out at https://help.zaprite.com.