
A quick-start guide to generating and sending a bitcoin invoice
This is the basic quick-start guide to creating an invoice with Zaprite. Once you have signed up and logged in to your account, you should be able to create and send your first invoice within a few minutes.
The basics
Every invoice requires you to add at least three pieces of information:
- A Recipient
- A Line Item
- A Payment Option
Let’s create our first Invoice
Step 1: Create a new Invoice
Start by clicking the New Invoice button, either in the Quick Create menu in the Dashboard, or on the Invoices page.
When you create a new Invoice, you will be automatically redirected to that Invoice edit page.
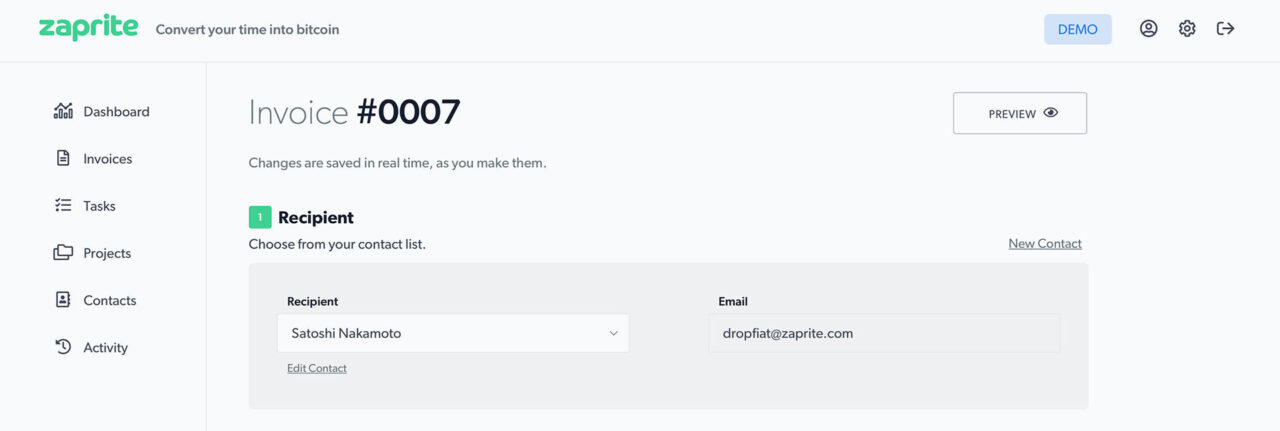
Step 2: Add a Recipient
Every invoice requires a Recipient (Contact). You can either select from your existing Contacts (see image above), or add a new Contact.
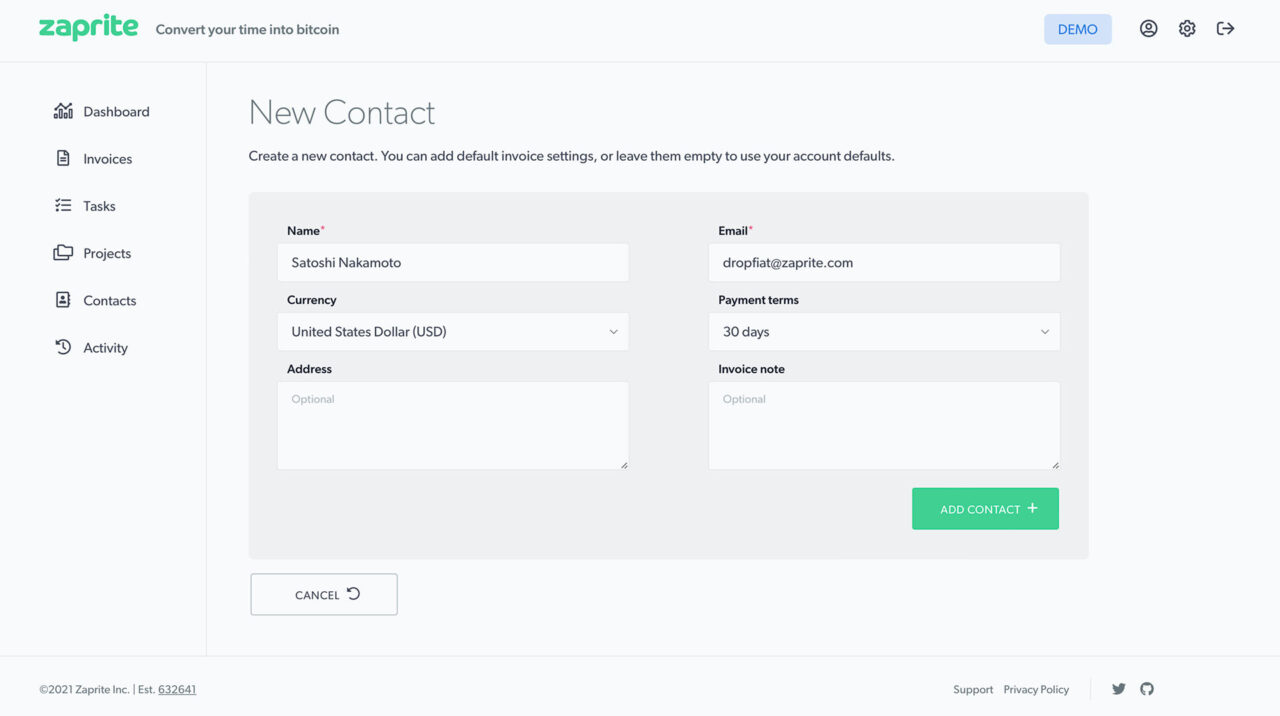
Create a new Contact and add the required fields: Name and Email, as well as any other optional information. These details can be edited later.
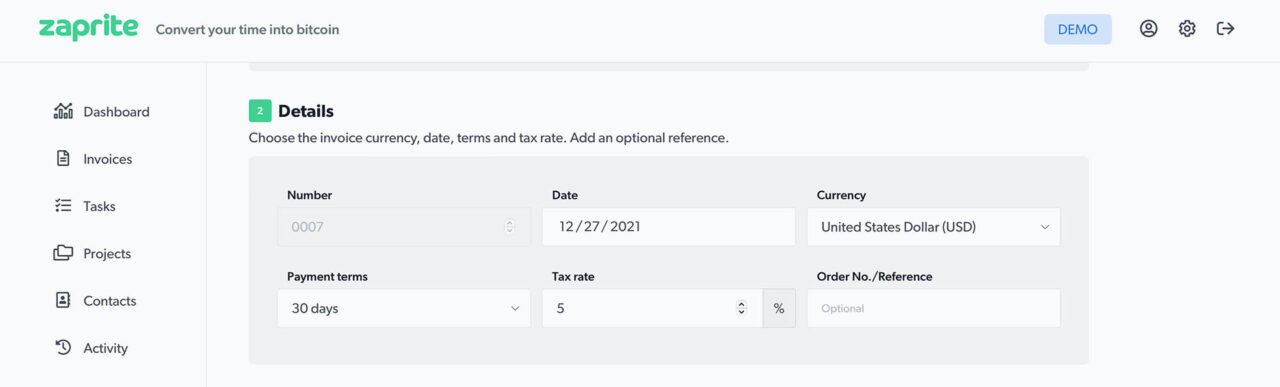
Step 3: Edit Invoice Details
Add this point, you can edit any of the Invoice details—such as date, currency or terms—or leave the defaults as they are.
Step 4: Add Line Items (or existing Tasks)
The next step is to add your Line Item(s). Zaprite is also a Project Management platform, so it allows you to create Projects and Tasks. You can think of these Tasks as individual Line Items on a traditional invoice.
When you create an invoice, you have two options:
- Create and a new Line Item, or
- Assign a previously created Task.
When you select a Contact from the dropdown in the Recipient section, the Tasks section will pre-populate with any ‘open’ or ‘completed’ Tasks assigned to that particular Contact.

You can click the checkbox beside each task to add or remove it from the Invoice.
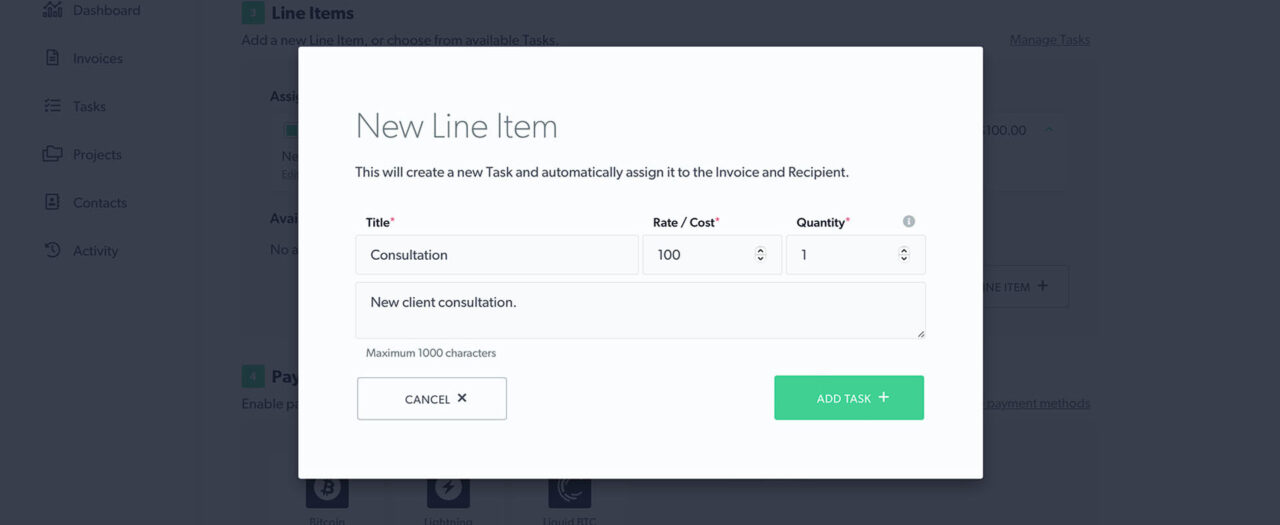
If there are no Tasks available, or you would like to create a new Line Item, simply click the New Line Item button. (Note: you will need to have a Recipient selected in order to add a new Line Item.)
Add a Title and then enter the Rate and Quantity. You can also add an optional Description, which will show up on the Invoice. These details can be edited later.
Step 5: Enable Payments
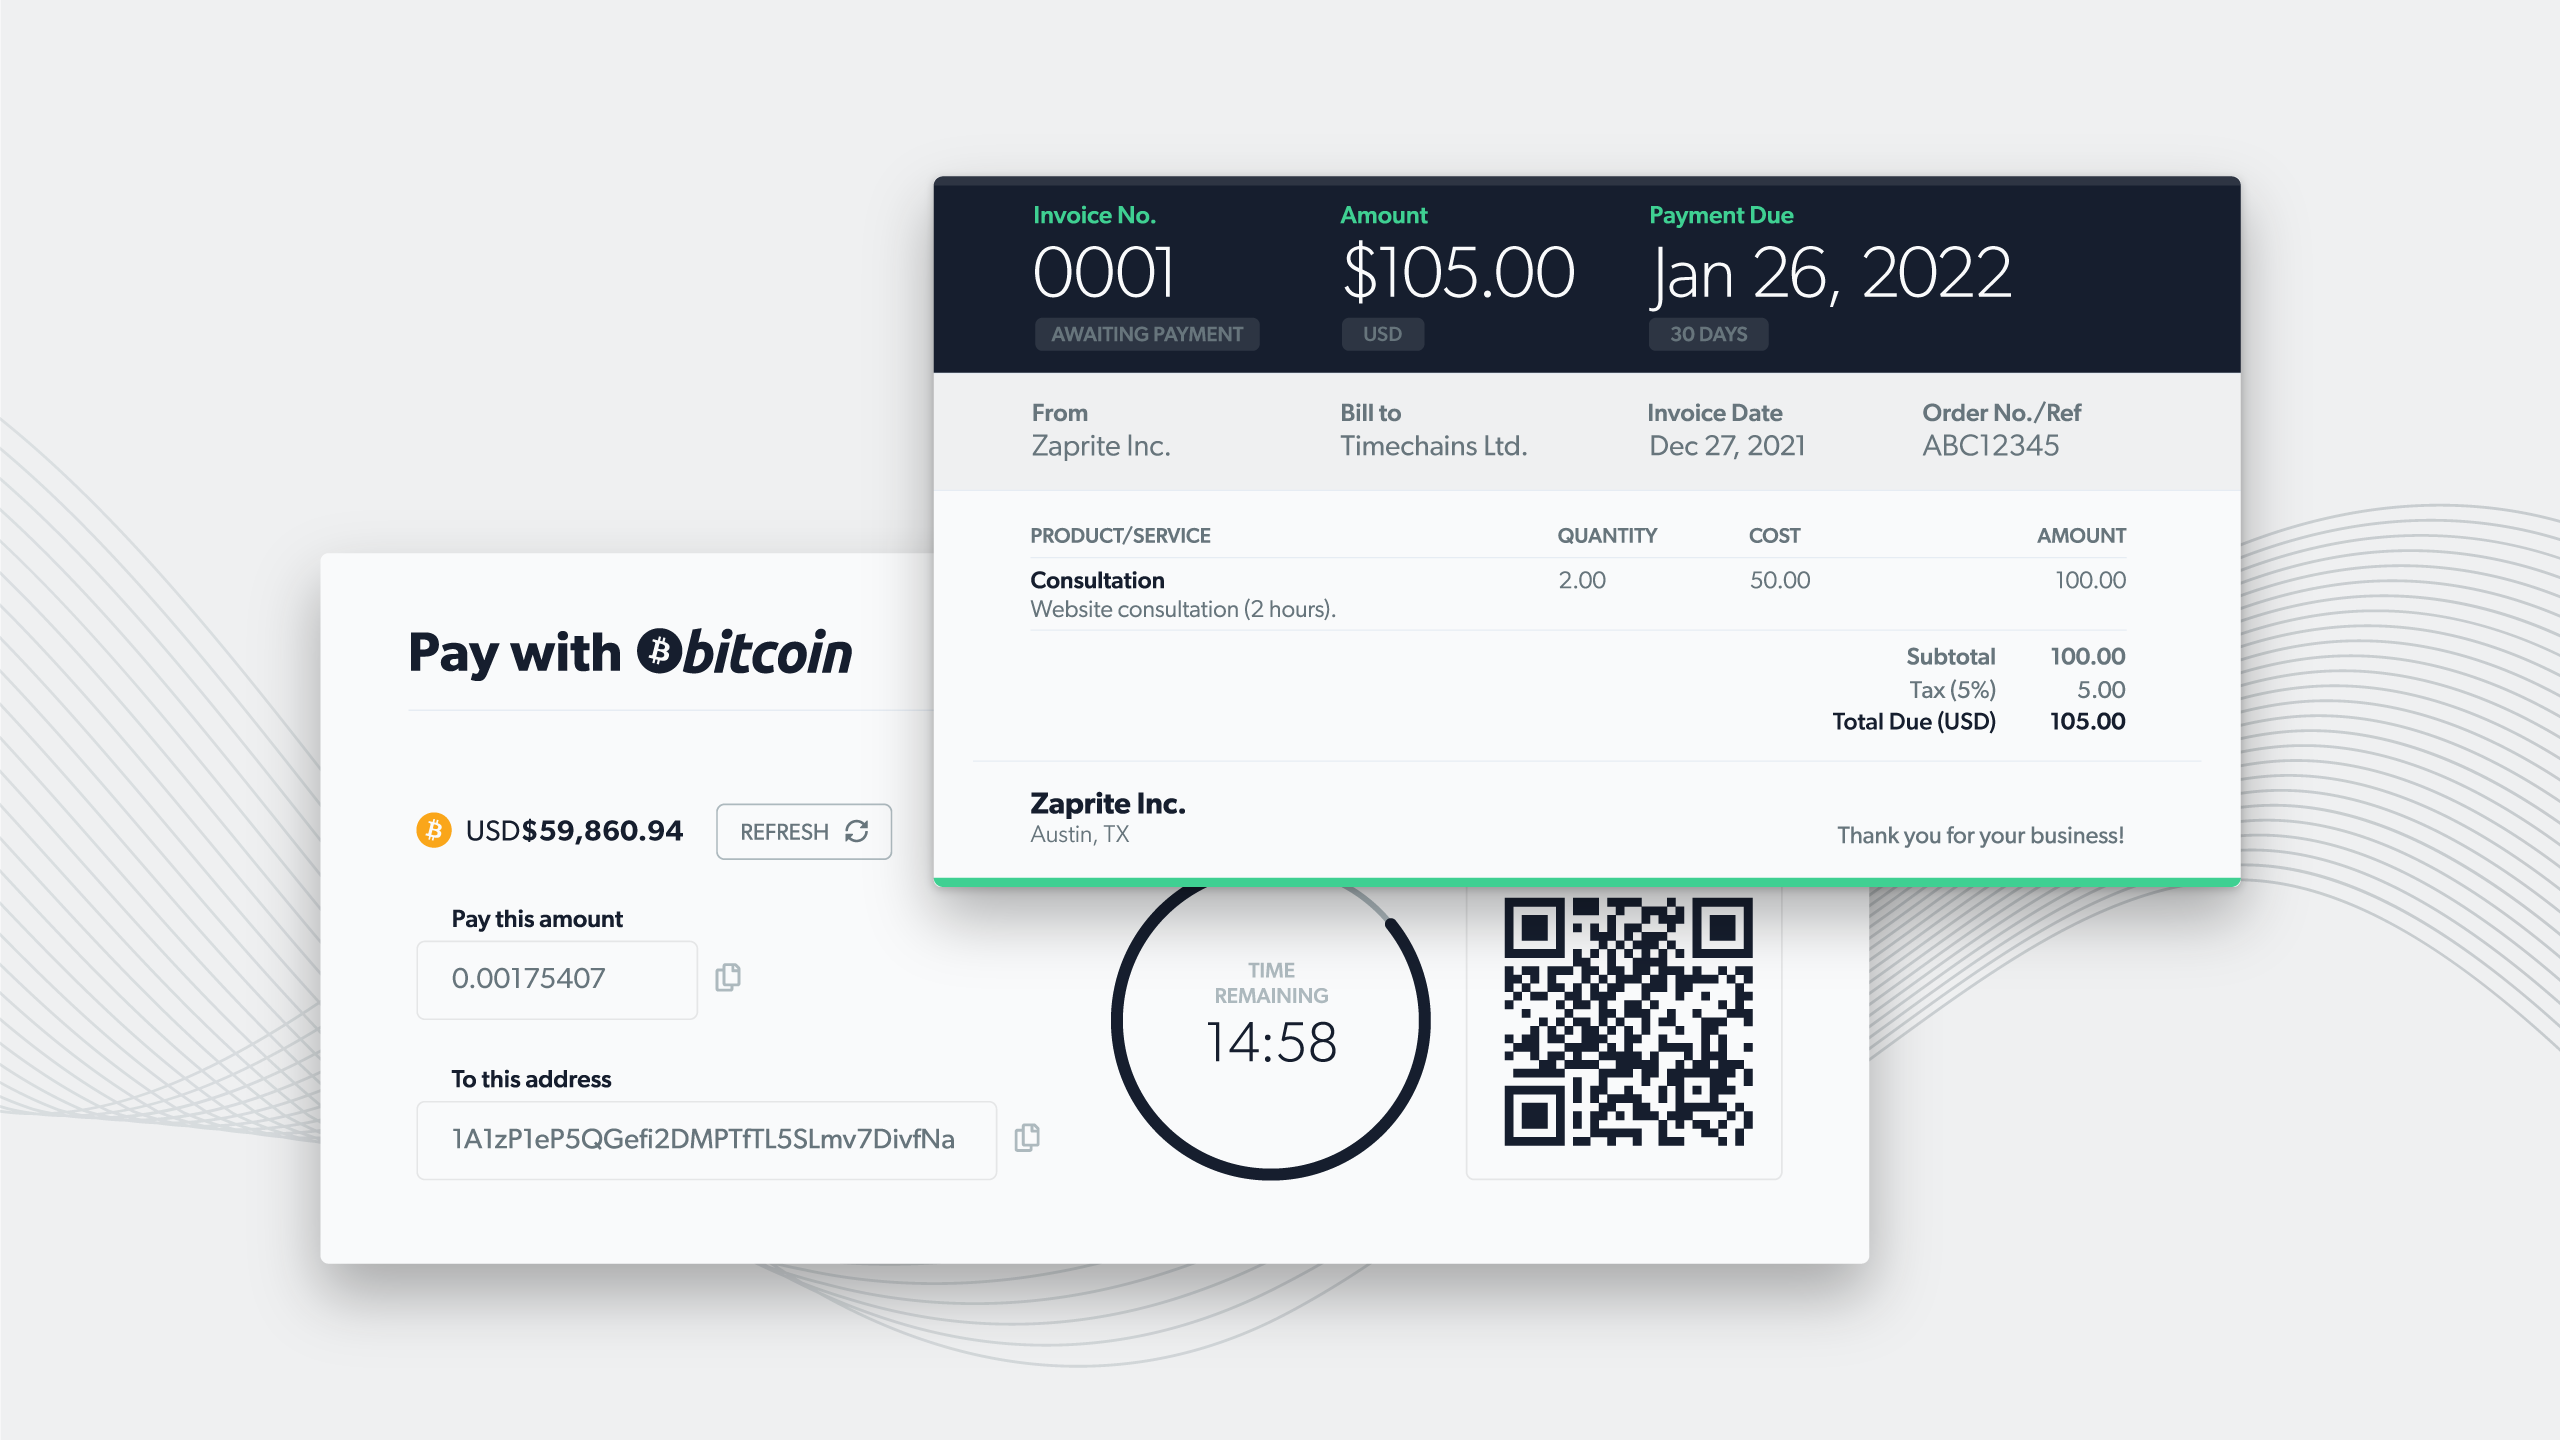
Next, you’ll need to add a payment option on your Invoice. Bitcoin payments are enabled by default.
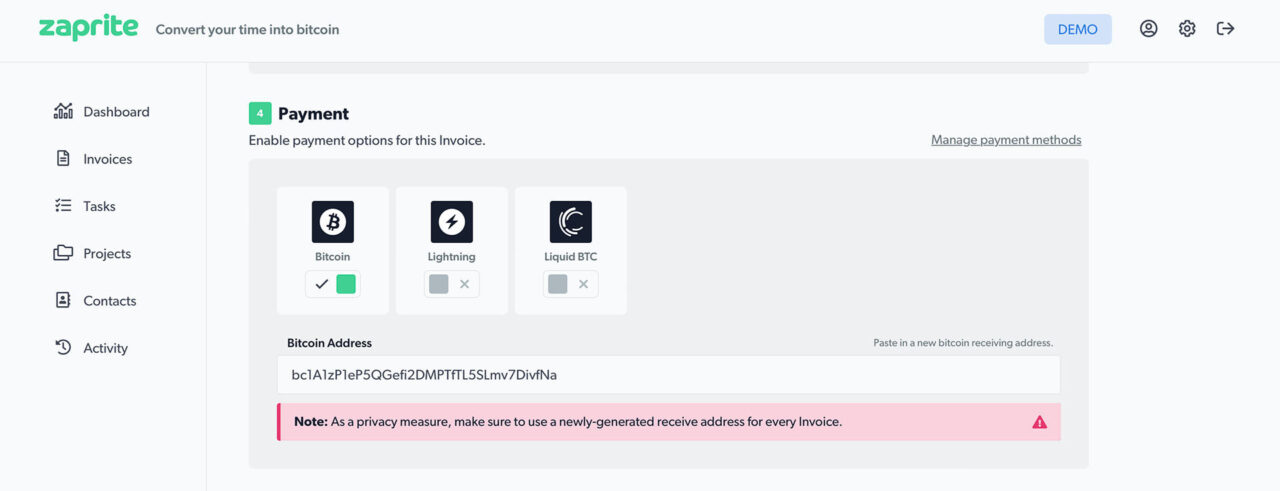
Remember, Zaprite is non-custodial. So you will need to have access to your own Bitcoin wallet to generate receiving addresses.
Never re-use bitcoin receiving addresses. As a privacy measure, make sure to use a newly-generated receive address for every Zaprite Invoice.
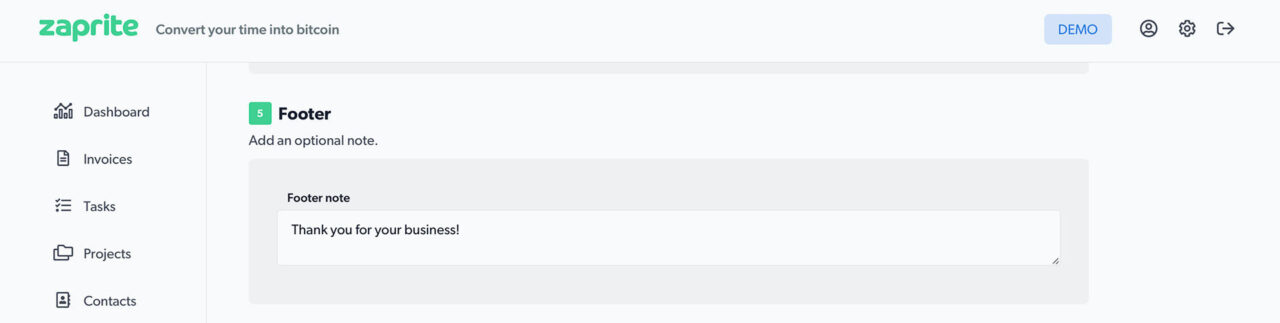
Step 6: Invoice Note
You can add an optional note for the payer, which will appear in the footer of the Invoice.
Step 7: Preview your Invoice
When you’re finished editing, make sure you look over the Invoice Preview.
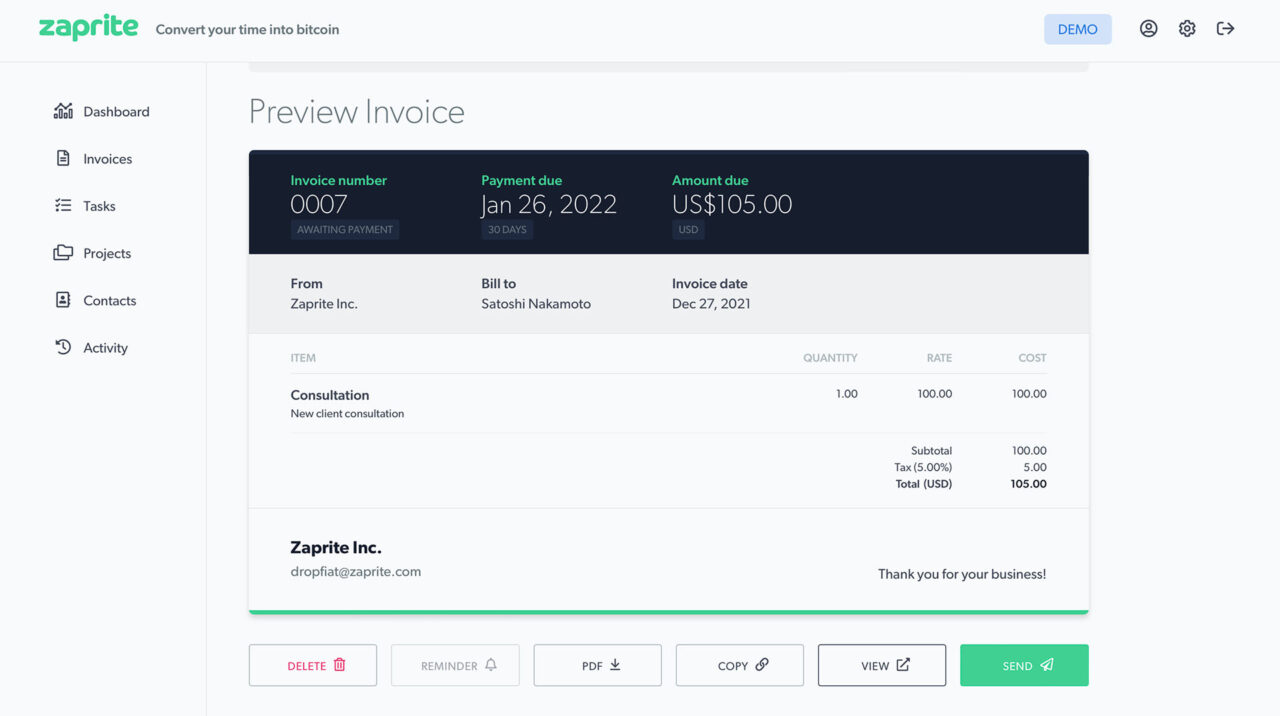
Double-check that all details are correct, including the invoice dates, currency and totals (including any optional Tax amounts added).
Step 8: Send your Invoice
Click the Send button at the bottom of the Invoice Preview. Confirm the email address shown and then send the Invoice to your Contact for payment.

Congratulations! You’ve just sent your first invoice.
You will receive an email notification when your Recipient has paid the Invoice. You can then check your own Bitcoin wallet and make sure the incoming transaction has been confirmed.
If you haven’t already done so, you can sign-up for a free account at https://app.zaprite.com/signup using just an email address.