
With Zaprite, you can connect any WooCommerce store and use your dedicated hosted Checkout for all Order payments.
Connect your WooCommerce Store
The following is a guide on how you can connect your WooCommerce store to Zaprite to start accepting payments for your Orders through your hosted Zaprite Checkout, directly to your own wallets.
Step 1: Activate Woo Connection
The first step is to activate the Woo plugin. Visit the Connections tab in your Zaprite account and click the ‘Connect’ link under the Woo card.
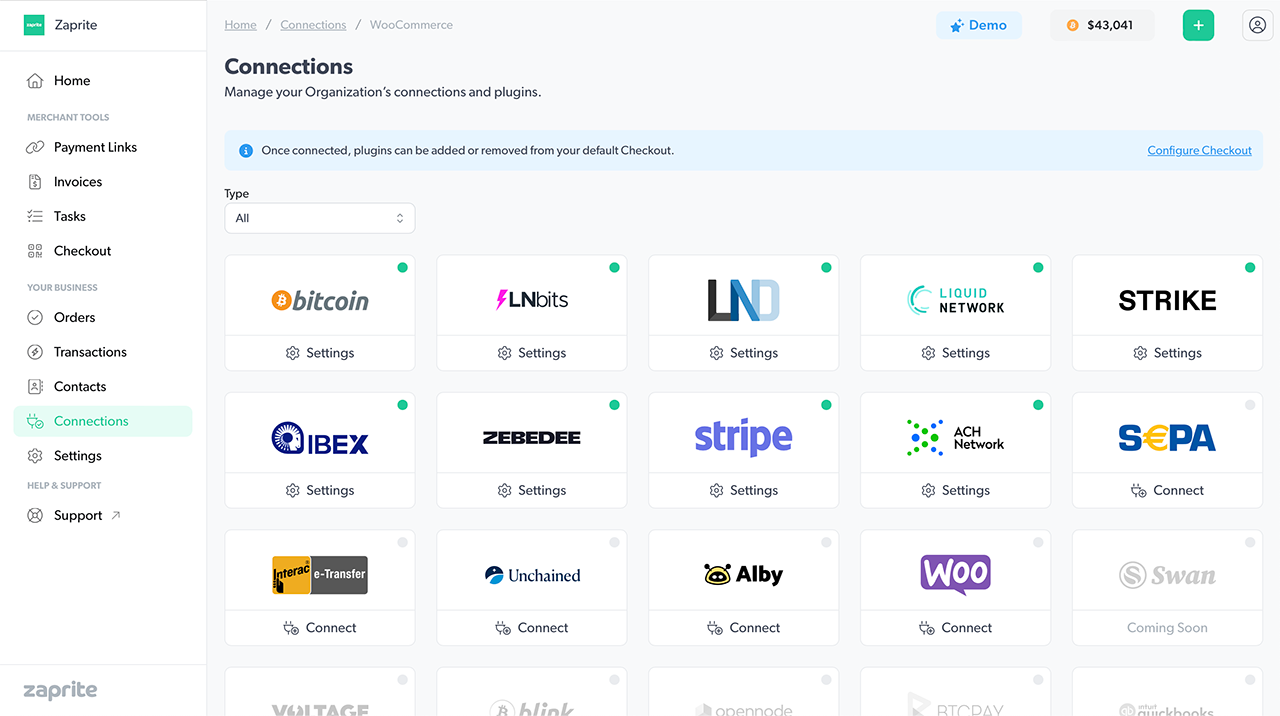
Once activated, you will be brought to the ‘Settings’ screen to configure your connection.
Step 2: Configure your connection
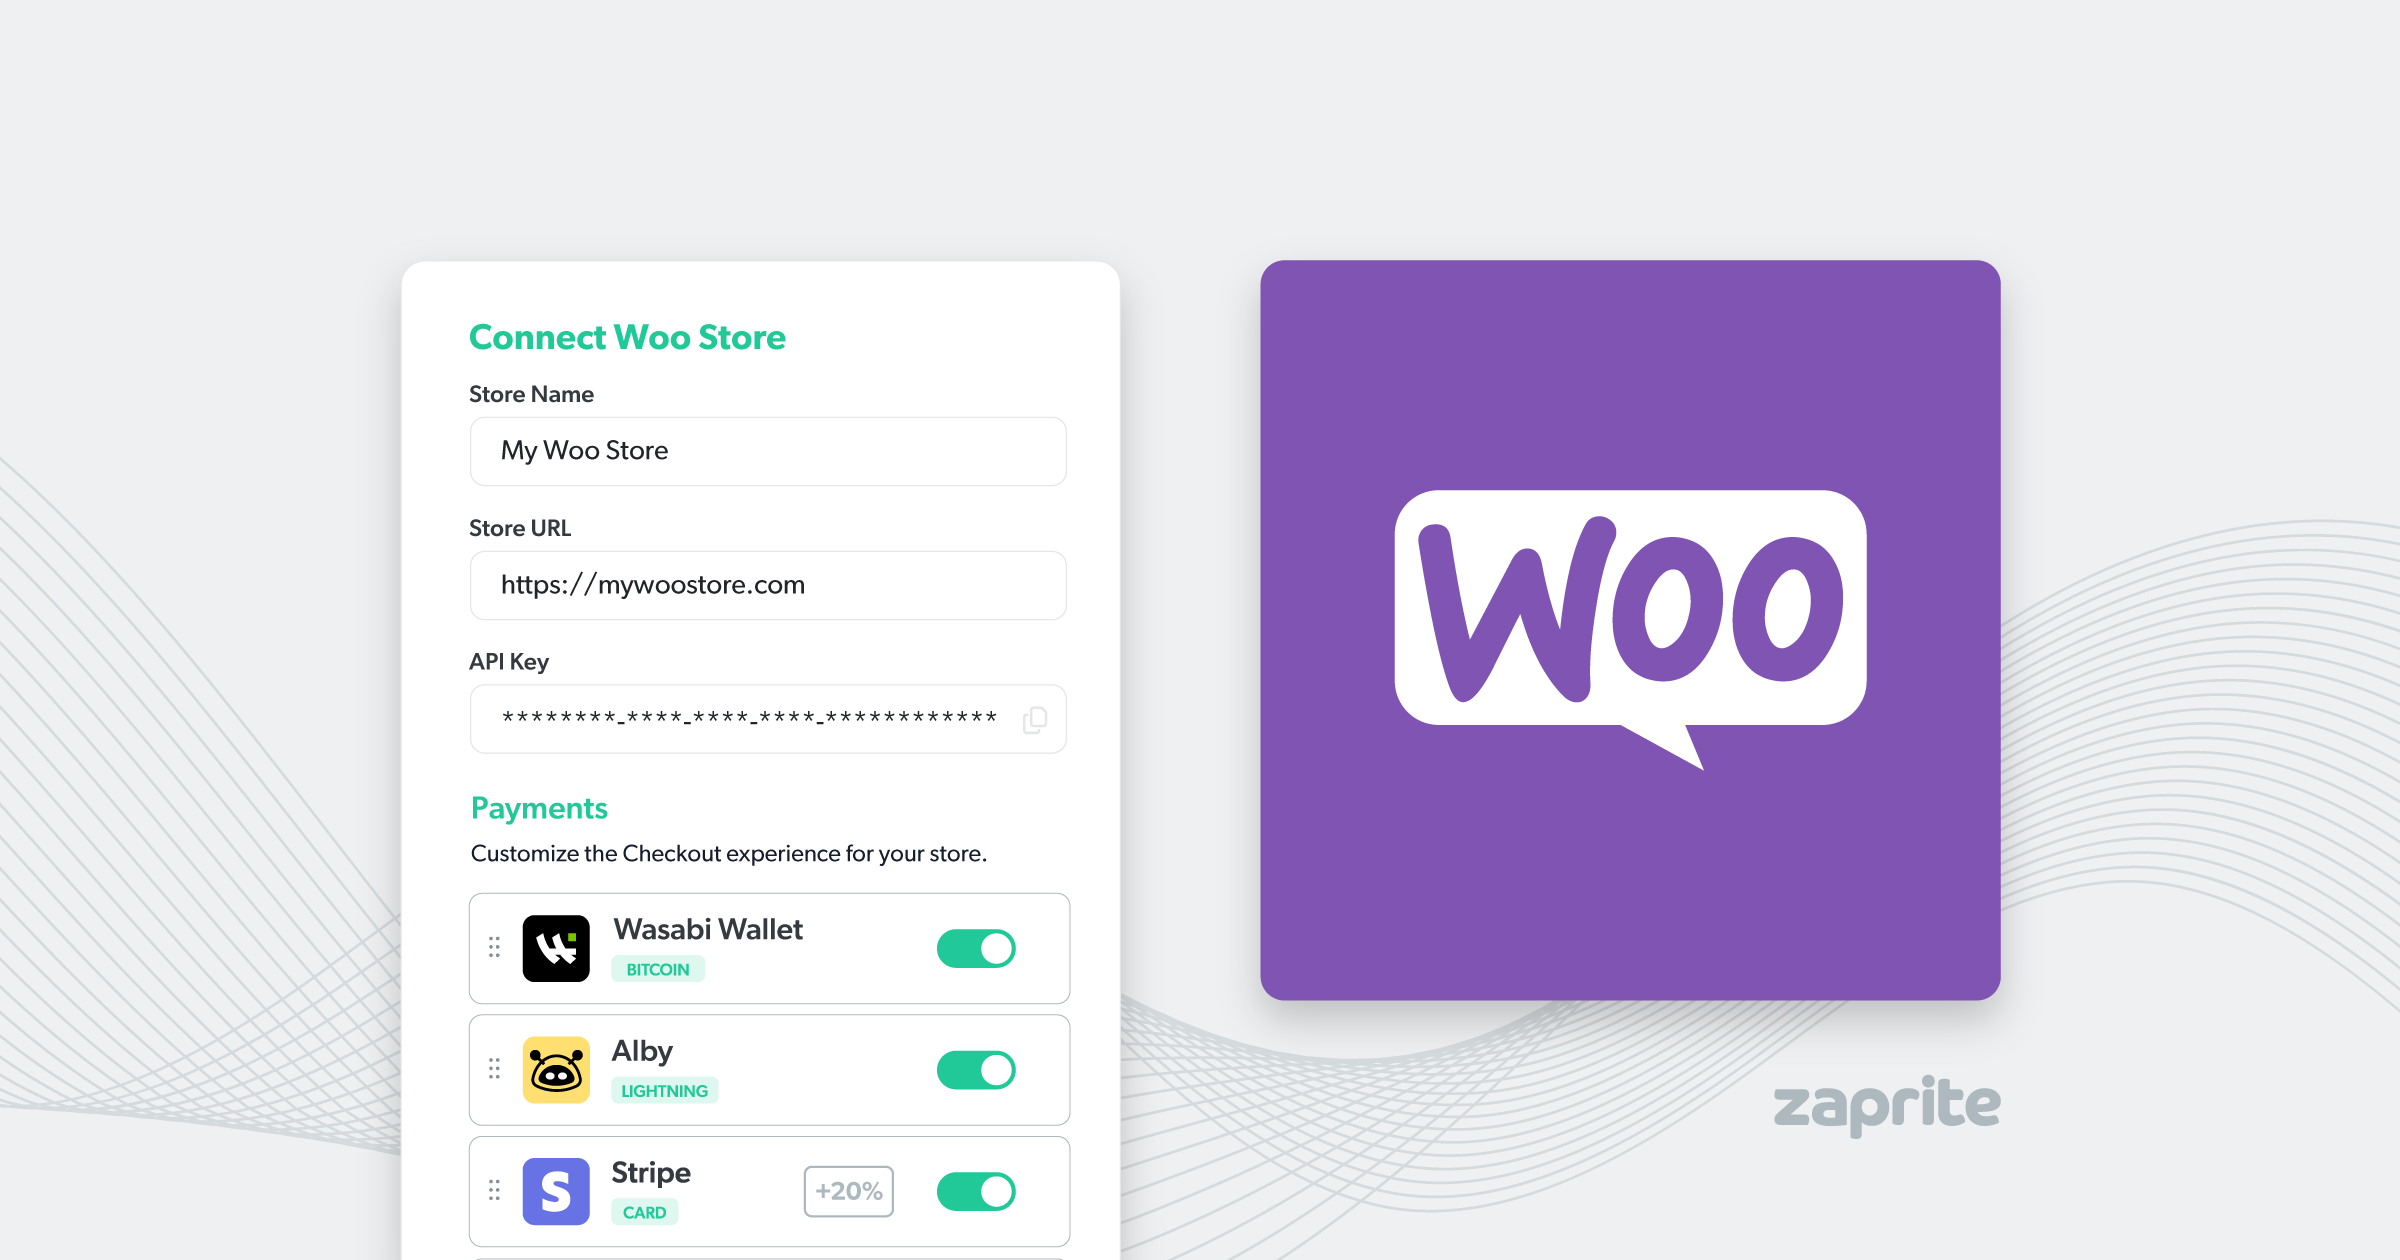
2.1 Store Information
The next step involves adding some information about your Woo store:
- Store URL: The main domain name of your store.
- Store Name: An internal Label, shown within the Zaprite app only.

2.2 Configure Checkout
Next, configure the Checkout that you would like to use for your Order payments. Enable/disable payment methods and/or add an optional premium to fiat payments.
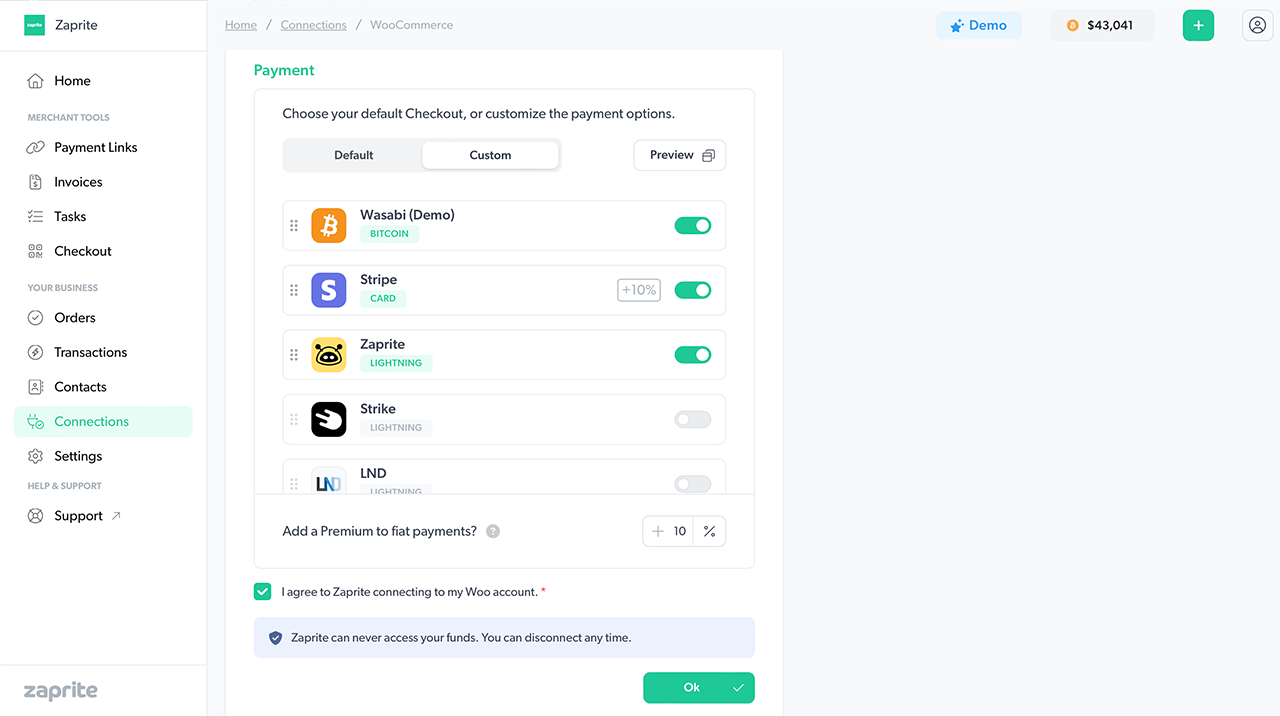
Finally, make sure you check the acknowledgement box, then click [OK].
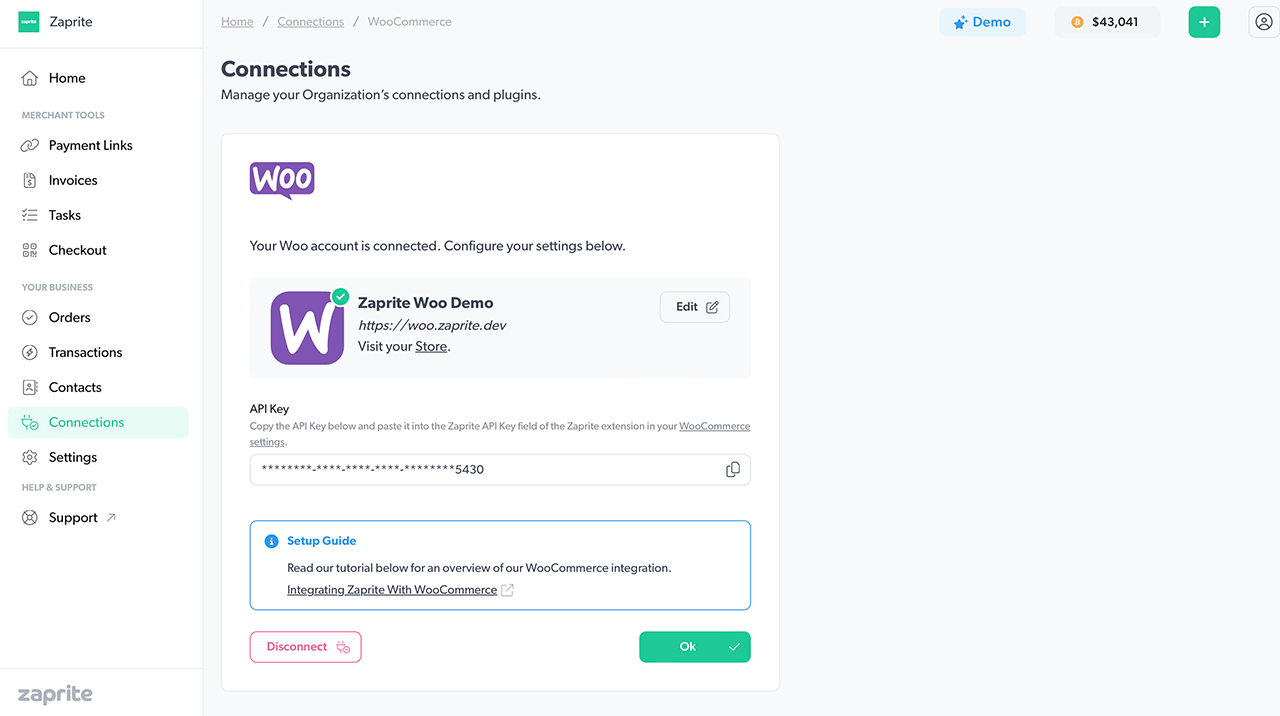
You’ll see your API Key on the next page. You’ll need to come back and copy this later.
If you want to disconnect your WooCommerce store you can simply click the Disconnect button and your store information will be removed from our database. You can reconnect at any time.
Step 3: Enable Zaprite in WooCommerce
Now you are free to enable Zaprite as your payment gateway for your WooCommerce store.
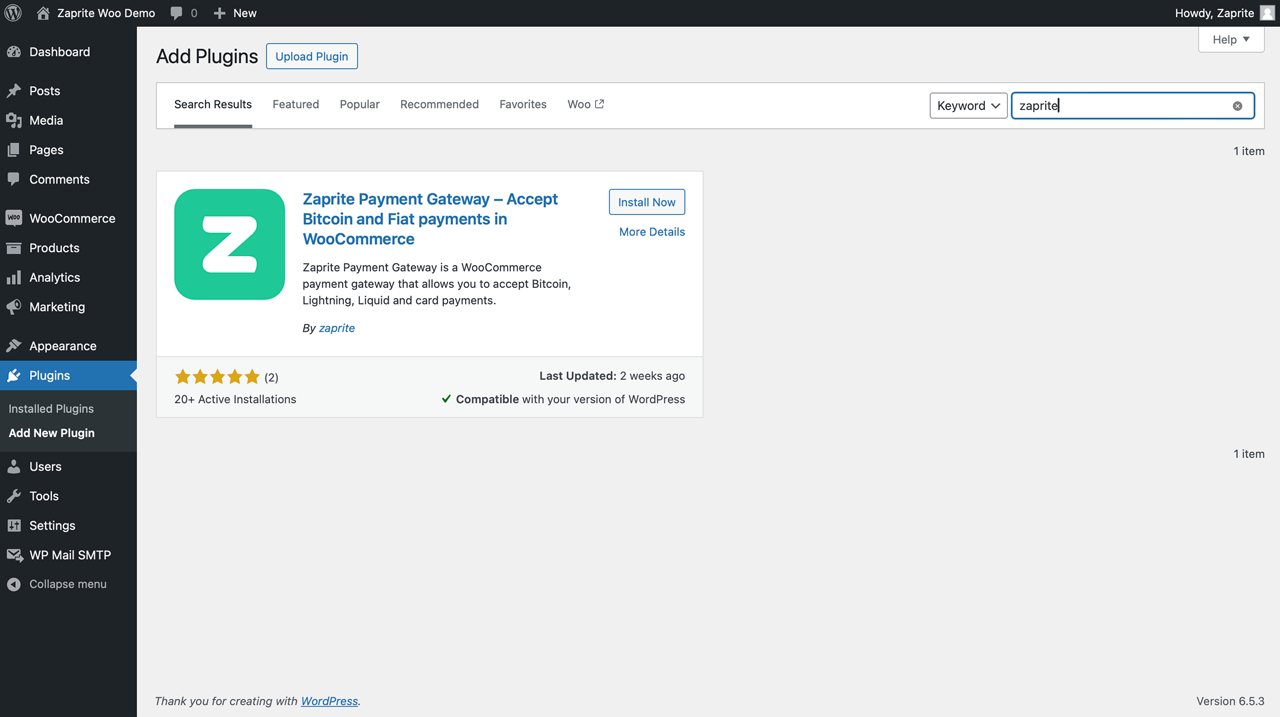
3.1 Install Zaprite Extension
If you haven’t done so already, you’ll need to install the Zaprite Payment Gateway extension from the official WordPress directory.
- Click Plugins > Add New Plugin.
- Search for “zaprite” then click the Install Now button.
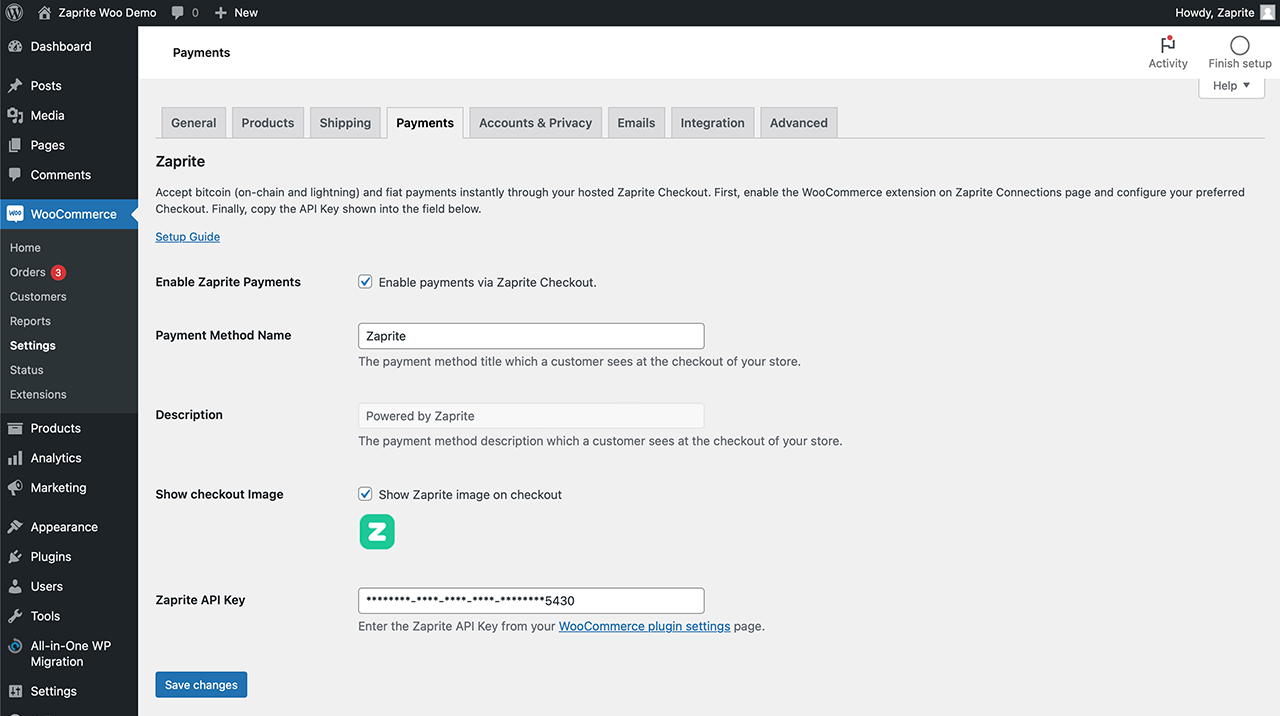
3.2 Configure Extension Settings
- Make sure Enable Zaprite Payments is checked.
- Choose a Payment Method Name for the Checkout.
- Choose to hide or Show checkout image.
- Paste in your Zaprite API Key.
The Zaprite API Key is the one generated and shown in Step 2.2 above.
When you are finished configuring the plugin settings, click Save changes.
You are now ready to accept payments for your WooCommerce store using your Zaprite hosted Checkout.
Payment Flow
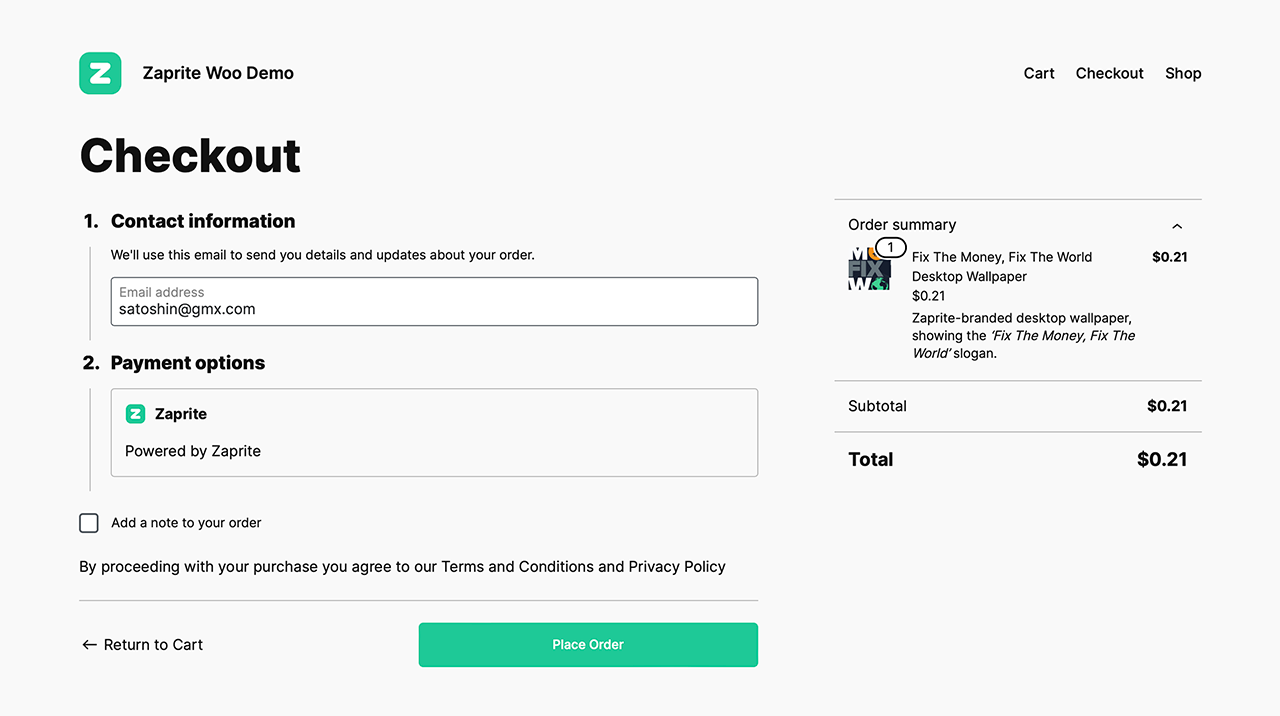
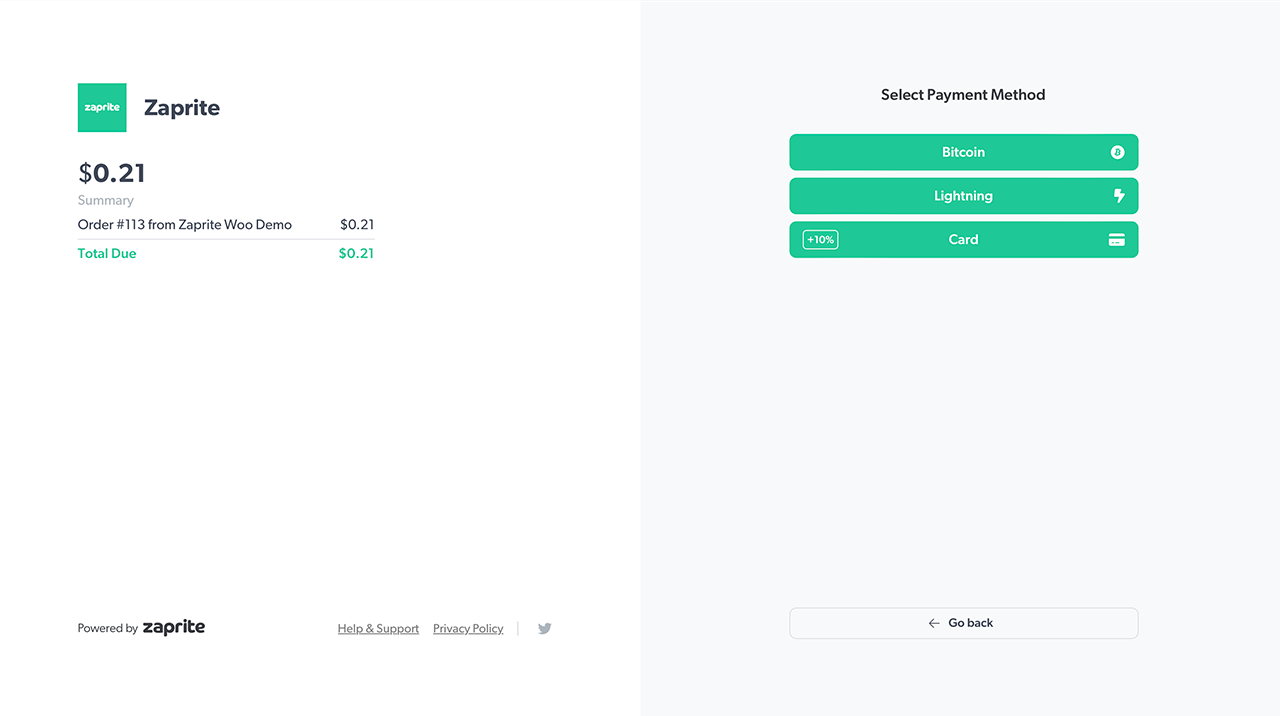
Now, when your customer wants to Checkout on your WooCommerce store, they will see the Zaprite checkout option. Your customer will be redirected over to your hosted Zaprite Checkout to complete the payment.
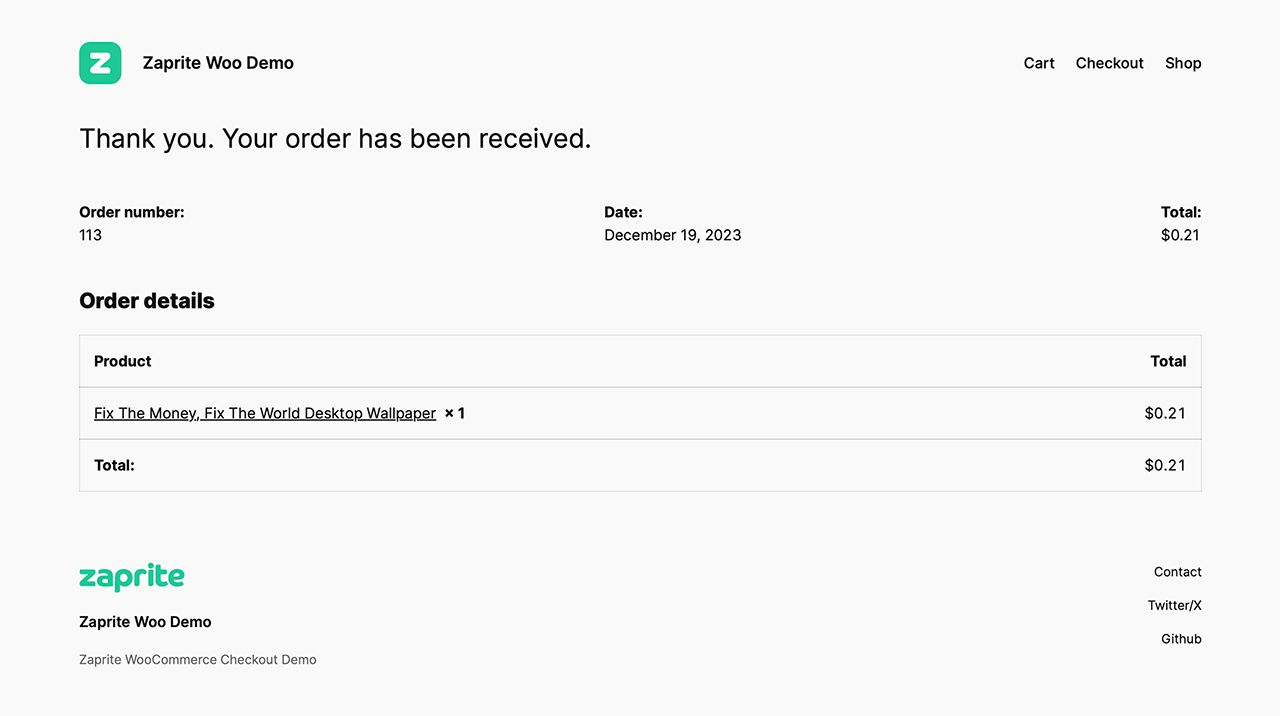
When the Order is paid, your customer will be redirected back to the Order Confirmation page on your WooCommerce store, where they will see a confirmation of their payment.
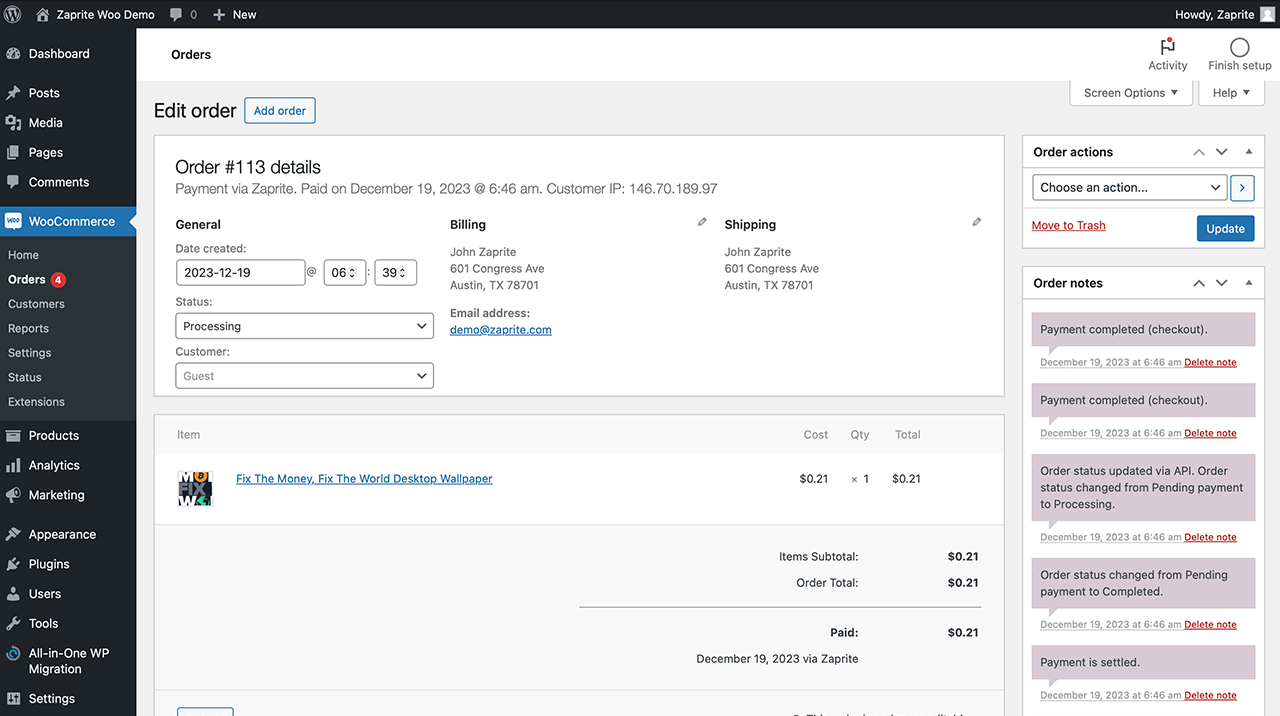
WooCommerce Order History
The Order will be processed as normal within your WooCommerce store. The Order will indicate Payment via Zaprite, and will contain all the information required, including Zaprite Order information.
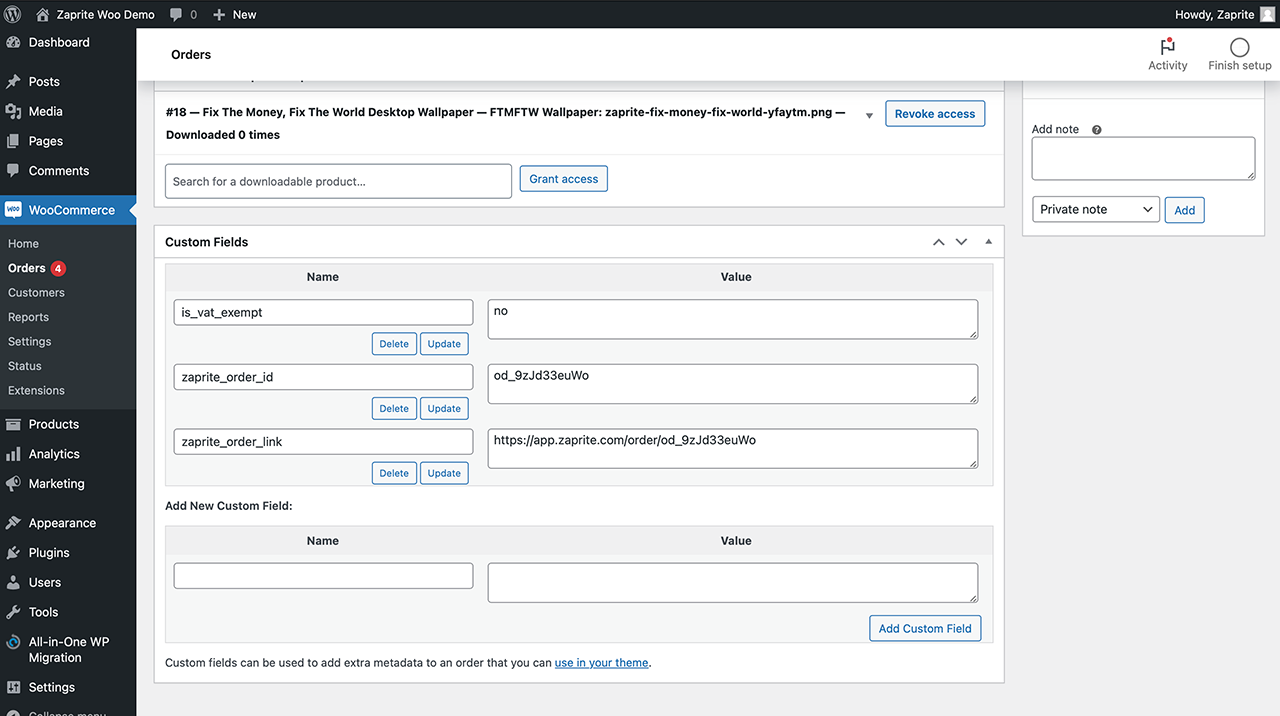
The Custom Fields section will display any associated Zaprite Order metadata, including:
- Order ID
- Order Link
- Fiat Premium (if included)
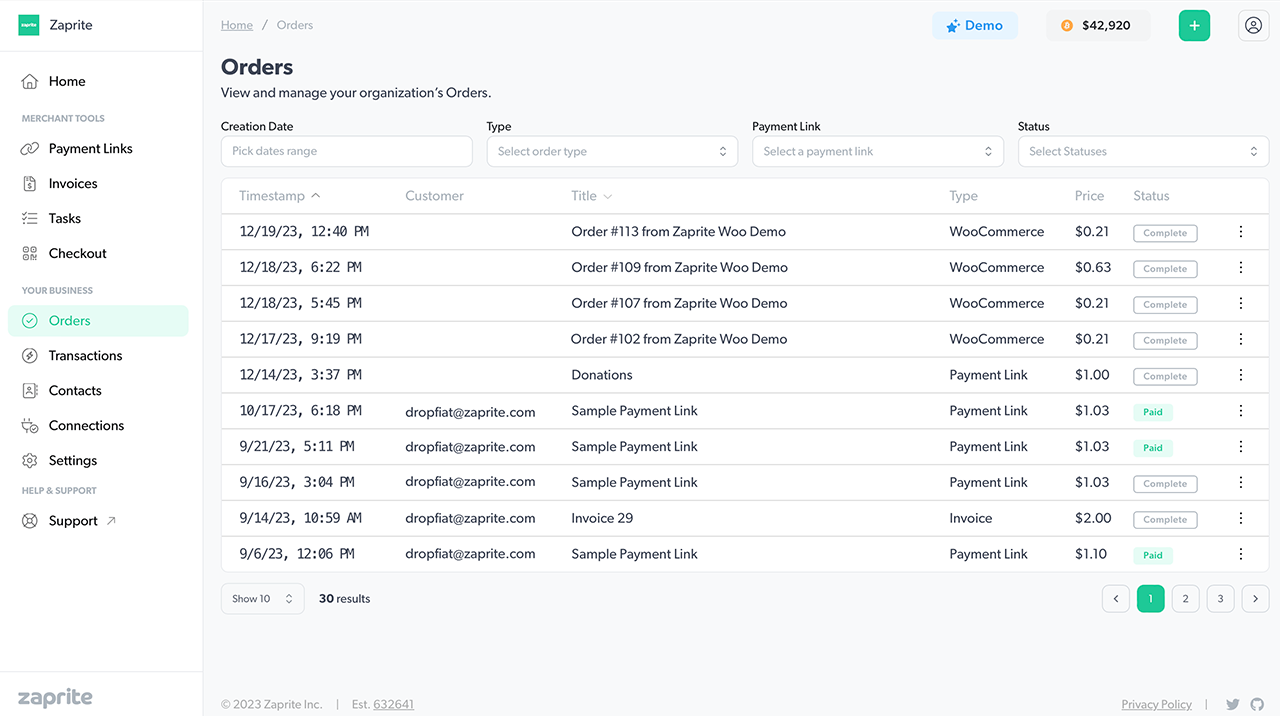
Zaprite Order History
Your Zaprite account will also create associated Order and Transaction data. When a payment is detected, we’ll record it in your Transaction history for future accounting and reconciliation.
See it in action
To see a live demo of the WooCommerce integration, visit https://woo.zaprite.dev.
Note: A video version of this guide is also available.
Help & Support
If you run into any issues connecting your WooCommerce store, or have general questions about using Zaprite, feel free to reach out at https://help.zaprite.com.