
In what can only be described as a Bitcoin Commons love affair, we are very proud to announce that Zaprite now supports the ability to connect your Mutiny wallet via your Lightning Address.
Before we get into the details on setup, a quick story on why Mutiny and why now.
We’ve long been a fan of Mutiny, both the product and the people who built it. A few of us at Zaprite work at the Bitcoin Commons 10 feet from the Mutiny team, and we’re constantly sharing ideas about each other’s products. It’s safe to say we know each other. Zaprite has also long had the strategy to meet our customers where they’re already comfortable. That means if you have a custody setup you like, we want to support that setup. Mutiny has a large passionate user base, and with the recent addition of fedimints, Mutiny brings a new experience for merchants looking for the most cost efficient and user friendly bitcoin payment experience on top of normal lightning payments. Since their launch of fedimints and LN Address, the integration became a no-brainer.
When asked about Mutiny+ users now being able to use Mutiny Wallet for Payment Links and Invoicing on Zaprite, Mutiny CEO Tony Giorgio said:
“Zaprite has built a fantastic non-custodial merchant experience that is flexible enough for anyone to bring their favorite Bitcoin wallet. This new integration speaks to the flexibility of both of our products, and we can’t wait to see Zaprite merchants using Mutiny to receive payments.”
Tony Giorgio, Mutiny CEO
Now, let’s get down to how to setup Mutiny in Zaprite…
How to Connect your Mutiny Wallet
Step 1: Buy Mutiny+
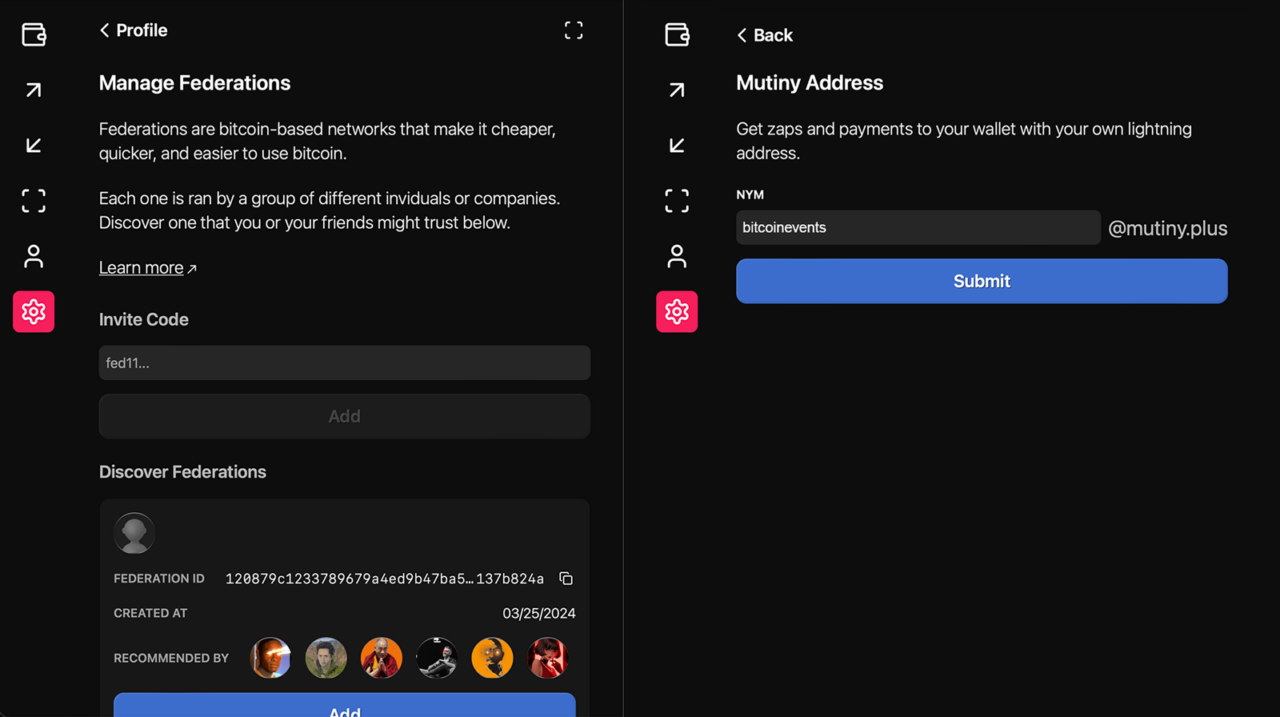
First things first, you need to be a Mutiny+ subscriber, and you need to join a federation. Follow the steps laid out by the Mutiny team in their announcement post. After joining a federation, you’ll be able to grab your LN Address from Mutiny.
Step 2: Activate Mutiny payments in Zaprite
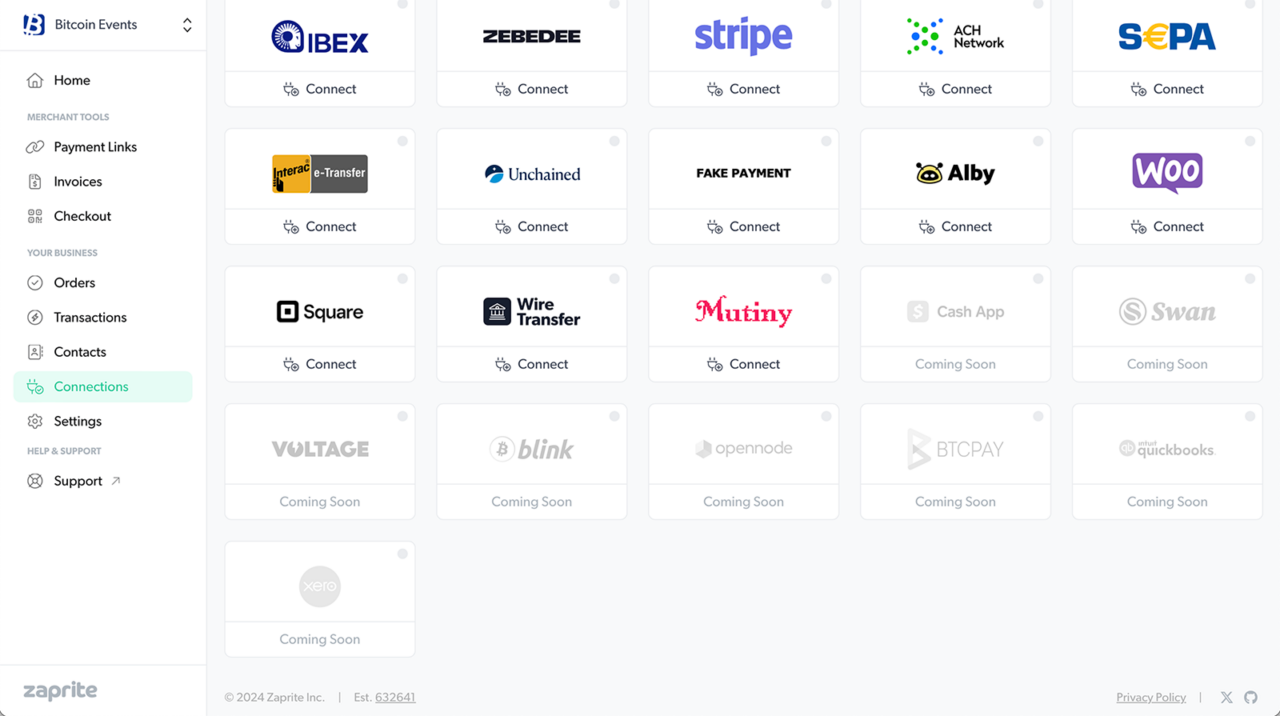
Now that Mutiny is configured correctly, you’re ready to activate the Mutiny plugin in Zaprite. Simply visit the Connections tab and click the ‘Connect’ link under the Mutiny card.
Once activated, you will be brought to the ‘Settings’ screen to configure your connection.
Step 3: Configure your connection
Here, you’ll be adding your Mutiny Lightning Address username. You only need to enter your username. Do not enter the last part of the Lightning Address (@mutiny.plus)
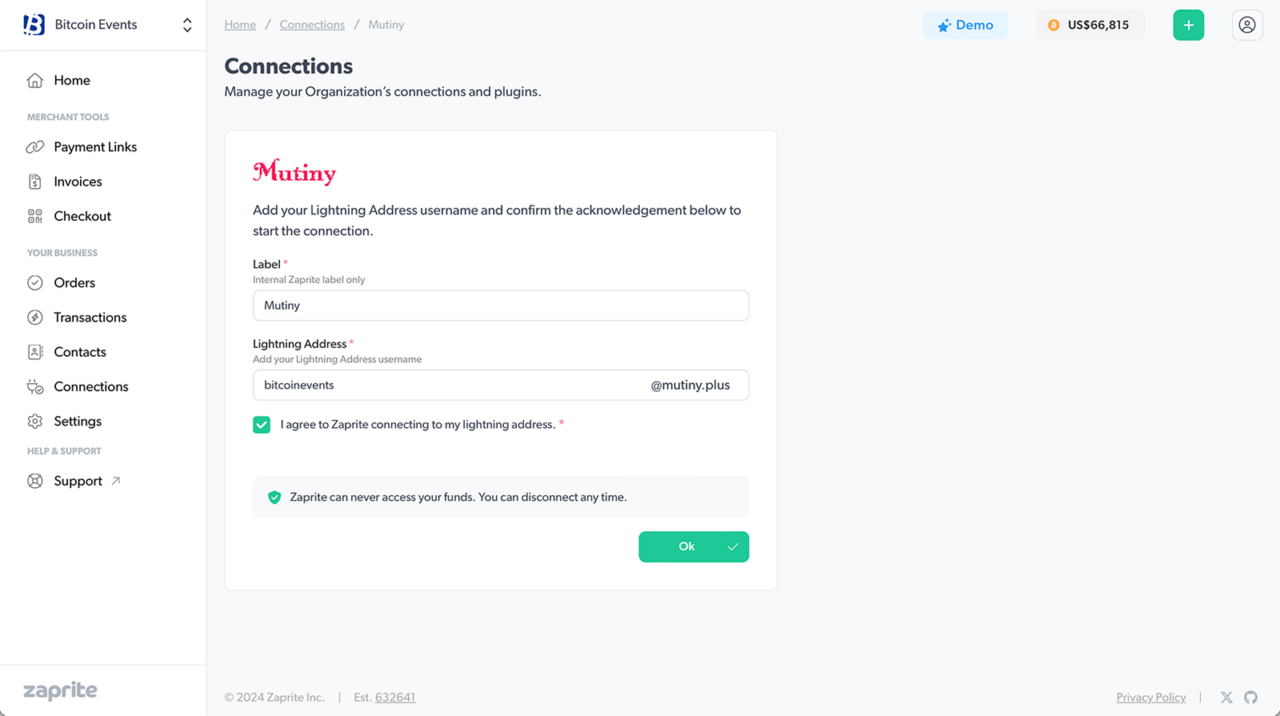
Be sure to check the box to agree to the terms, then ‘Connect’.
Note: Your Mutiny Lightning Address connection can only be used to generate receive invoices. Zaprite can never access your funds or spend from your account.
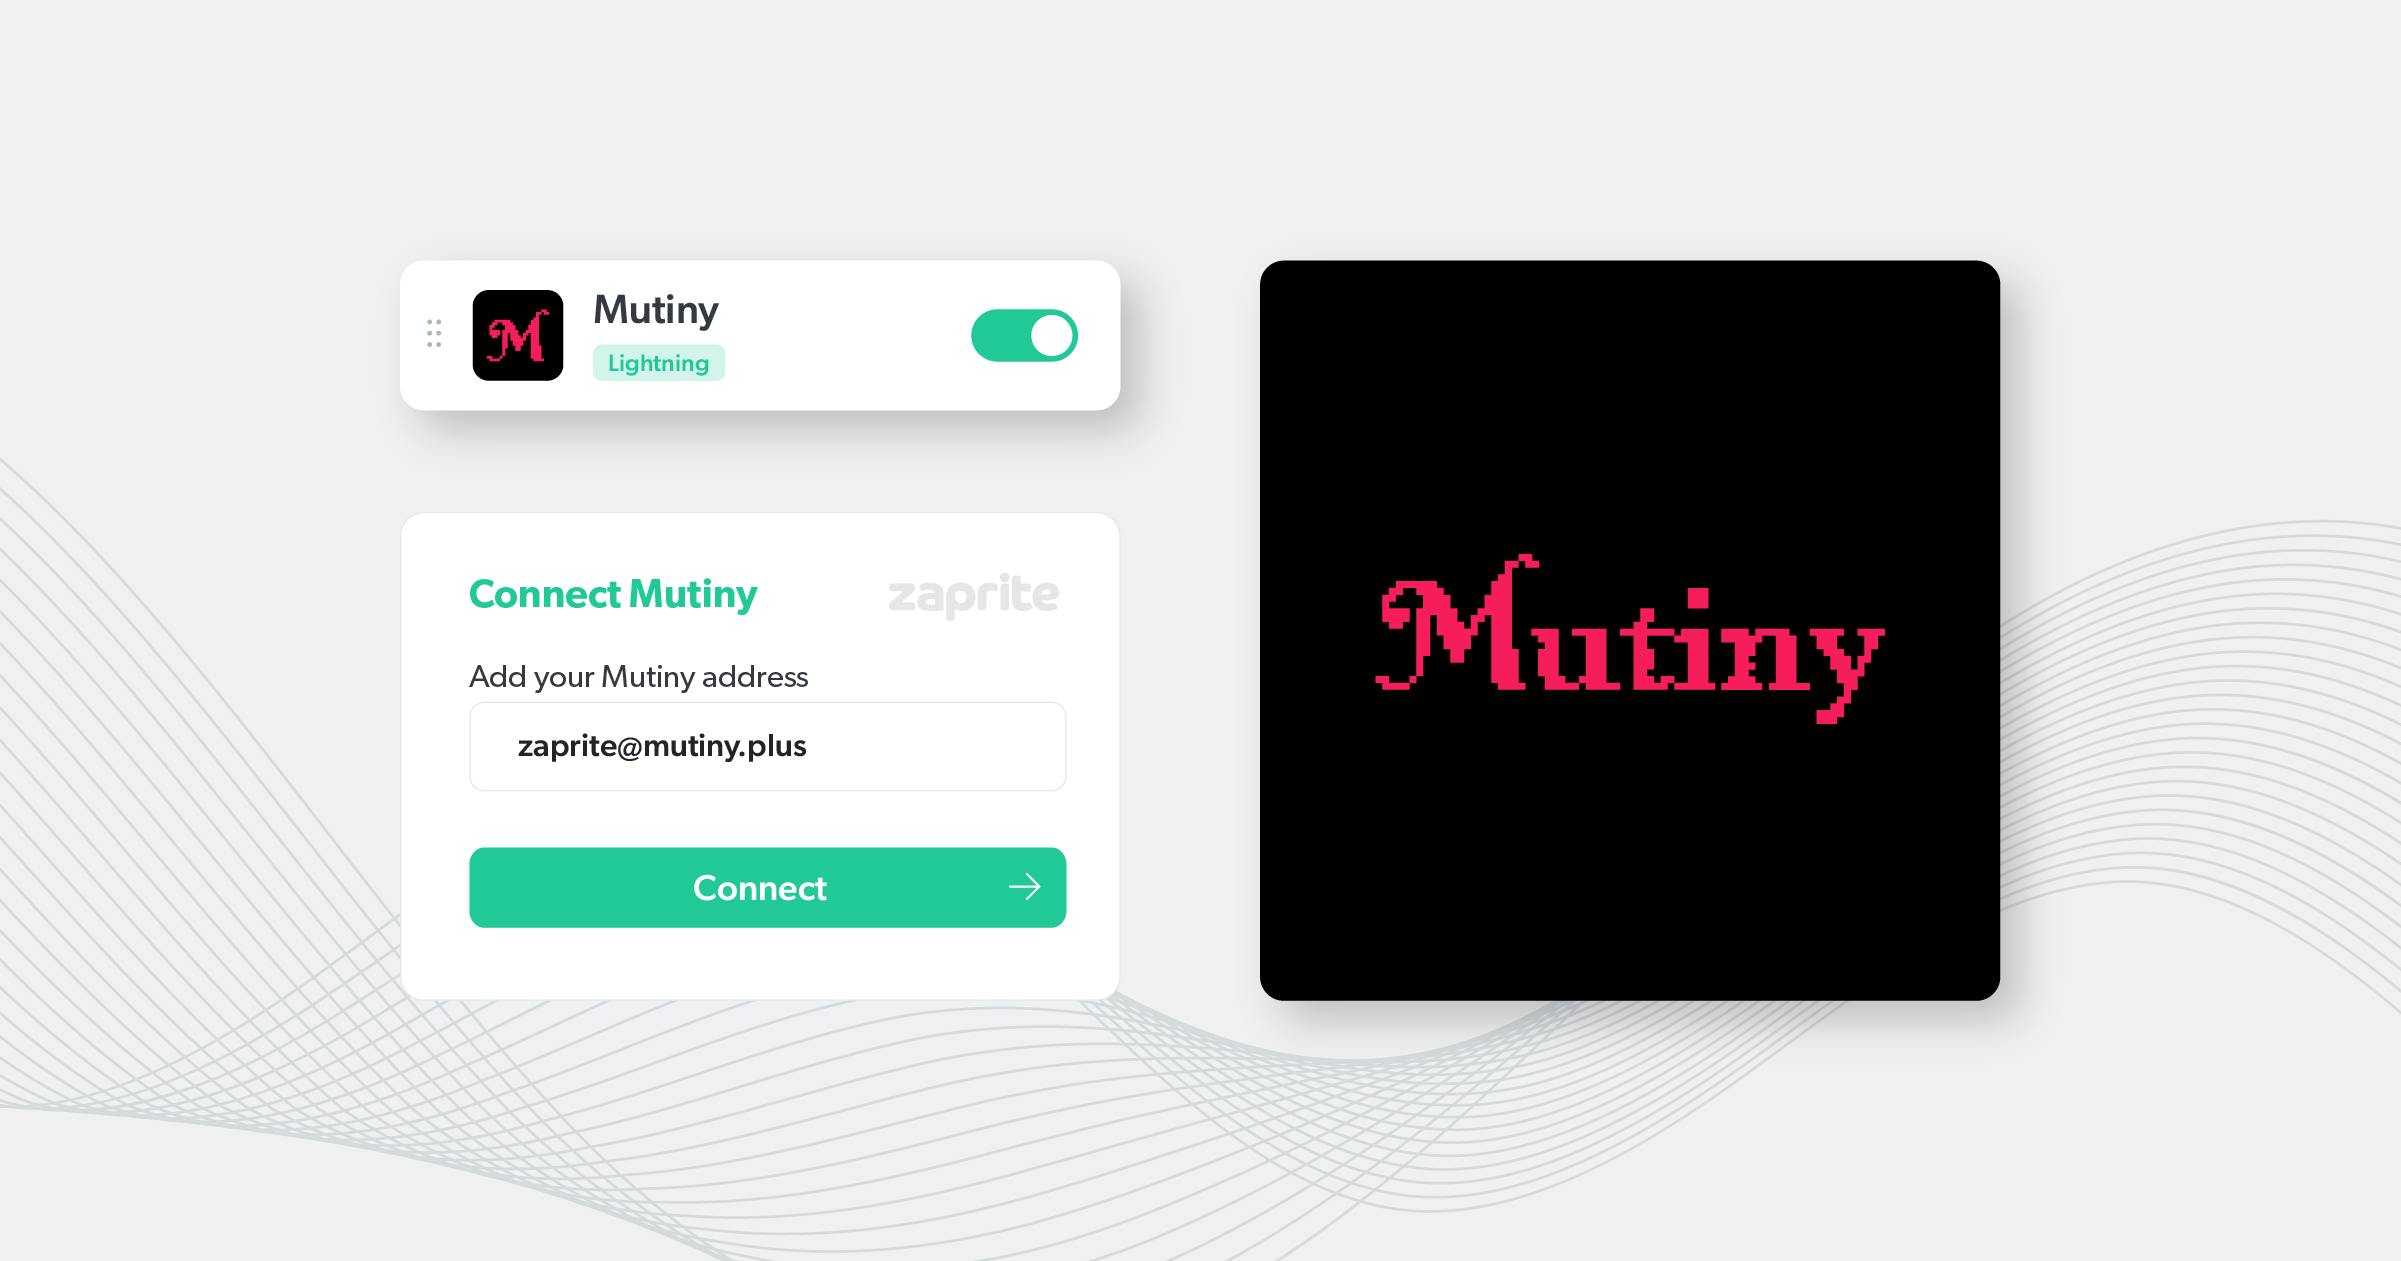
Step 4: Enable Mutiny on Checkouts
With the connection set up, you are free to enable Mutiny payments on Checkouts for Invoices and Payment Links. Simply click the Mutiny toggle in the ‘Payment’ section to allow your customer to pay over Lightning. Funds will be deposited straight into your Mutiny e-cash wallet. It’s important to note here that all payments to Mutiny will settle in your eSATS balance, while your customers will always pay normal Bolt11 invoices, and as such, your customers will always view this as a typical Lightning transaction. The Checkout settings page includes a similar toggle for enabling Mutiny on your default Checkout.
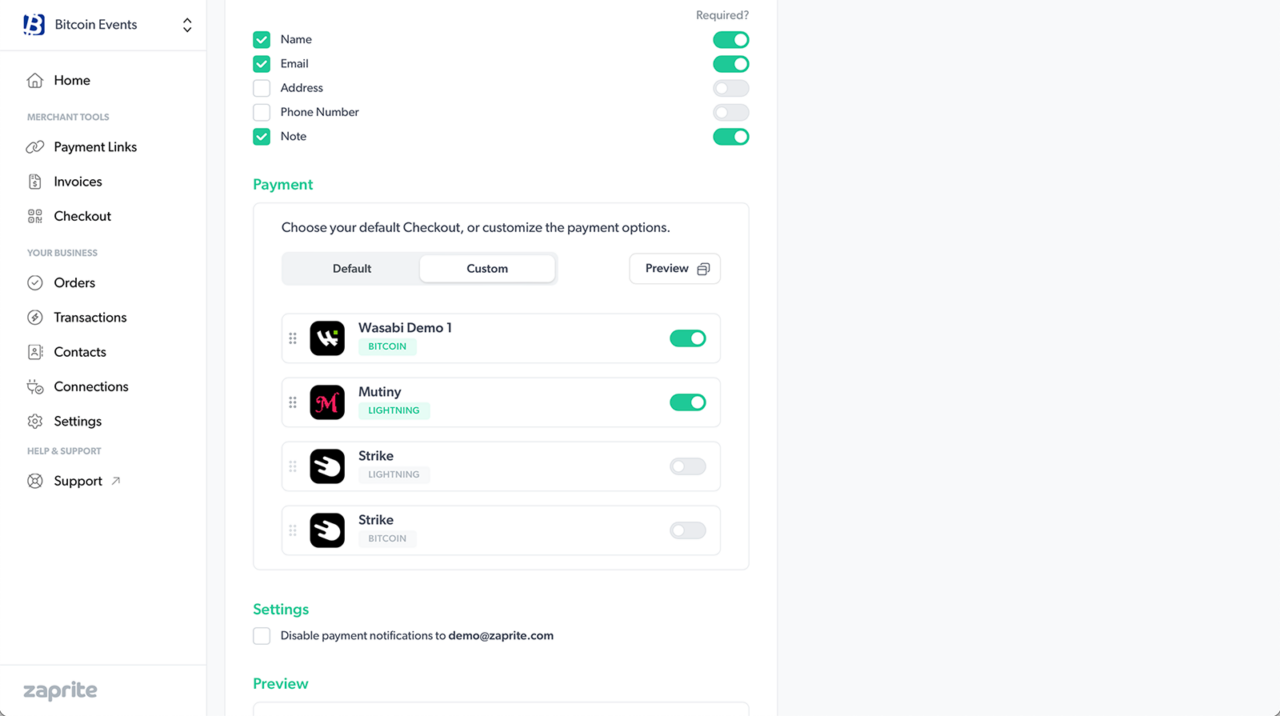
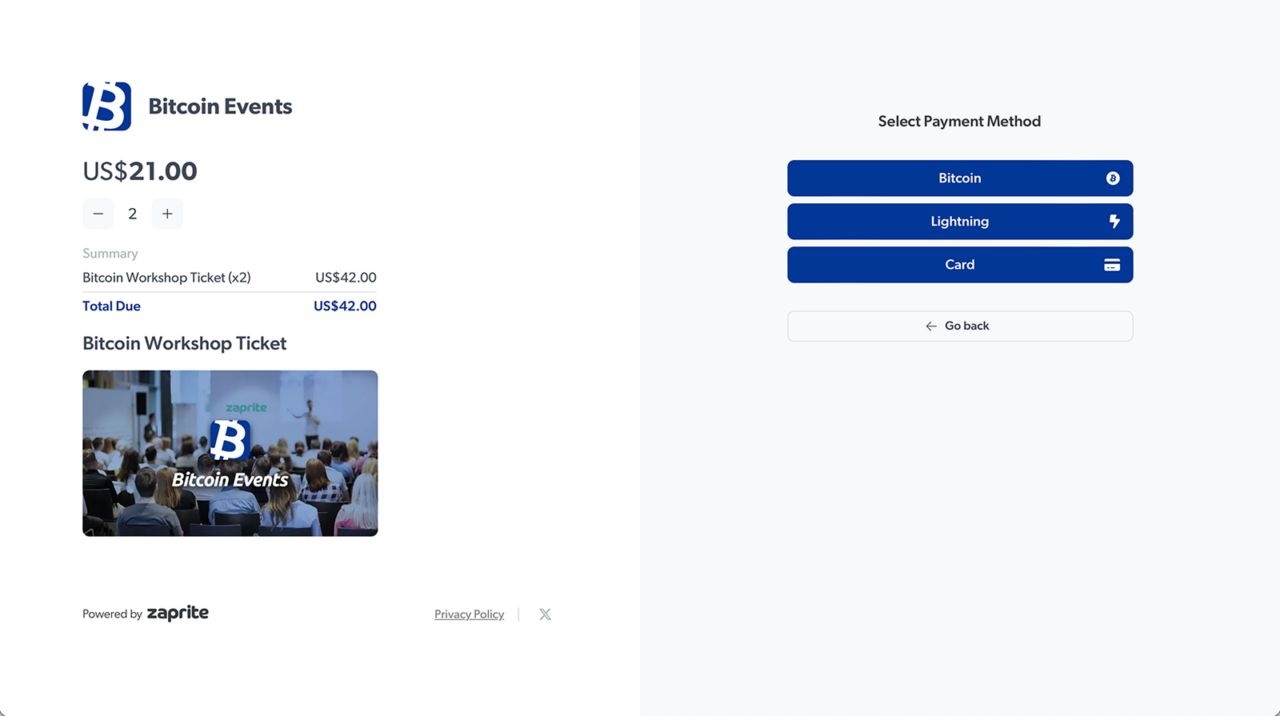
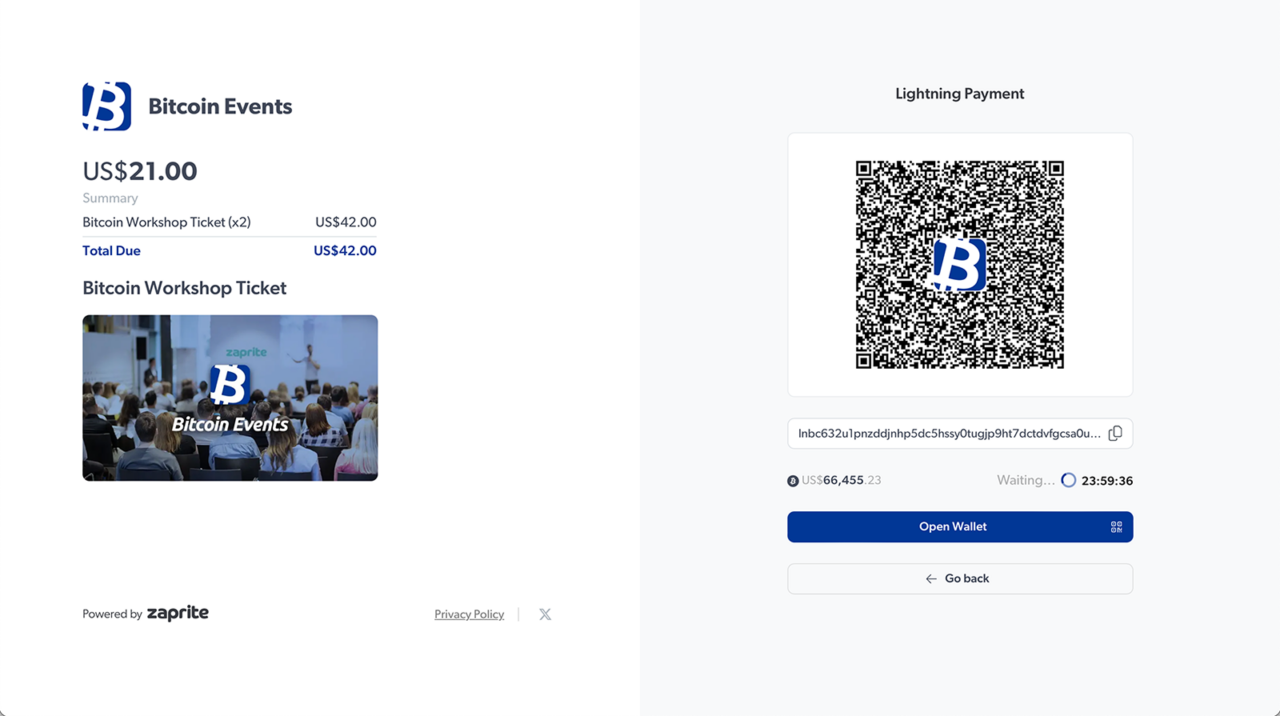
Your payer will now see a ‘Lightning’ option on your hosted Checkout page and a QR code will automatically be generated by Zaprite using your Mutiny Lightning Address.
When the Order is paid, you will receive an email notification with the payment details and the payer will be shown an option to download a PDF receipt.
And that’s it! You should have Mutiny payment options fully operational on your Zaprite Checkouts.
Once the payment is detected on our side, we’ll record it in your ‘Transaction’ history for future accounting and reconciliation purposes.
And of course, you’ll also see the original Transaction in your Mutiny wallet:
This integration is possible due to Mutiny supporting LN Address, and LNURL-Verify. LN Address allows for the simplest integration possible (see our Alby connection). If you have a lightning wallet you’d like added to Zaprite, as long as you’ve followed those two specs, reach out to us for consideration.
If you run into any issues connecting your Mutiny wallet, or have general questions about using Zaprite, feel free to reach out at https://help.zaprite.com.